
An Inexpensive & Accurate Way to Count Capsules
Years ago in the bulk herb retail business, I decided to start selling empty capsules. Buy in bulk, count some capsules, package them, and ship ’em out. It would be easy! I would sell in bags of 100 or 500 and I wanted my counting method to be accurate.
I lined up Dixie cups in rows of 10 and would put 10 capsules in each cup. This method works great when you have A LOT of distractions around you. If you can’t go to the count of ten without a child calling your name or a text coming in, then the cup method is a godsend. If you lose count, it’s so easy to count to 10 again for that cup. Imagine you’re up to like 88 and you lose count, how frustrating! After this happens a few times, you’ll never enjoy the process of counting capsules again. Thank you cup method!
But There Was Still Counting Involved, There Had to be a Better Way
Counting capsules is time consuming. Repeating the process multiple times is even worse! At one point, I even looked into capsule counting machines to try and reduce the monotony. They range from $20 for the paddle type, to thousands of dollars for gigantic stainless steel machines. At that point in my career, spending money was not an option, I had to figure something out that could be accurate and easy to use, so I came up with the drinking straw method. Basically, you glue parallel straws to a tray to use as guardrails, to separate rows of capsules, making counting quick and easy.
When complete, all I had to do was dump a large handful of capsules onto the tray, wiggle it back and forth a little, and slide the unused capsules back into their bag. No more counting, but just a little multiplication. 11 capsules in a row x 9 rows equals 99 capsules in my tray. Then I would pour them into ziplock-type bags with a few extra capsules for good luck and send them out to my customers. Packaged beautifully, of course!
Your tray size will vary depending on the box you use to make it, so I’m not going to tell you how many capsules you’ll be able to count with your counting tray. The bigger the box, the more straws you can fit. The longer the straws, the more capsules you’ll fit in a row. The more rows, yada yada yada, you get the idea.
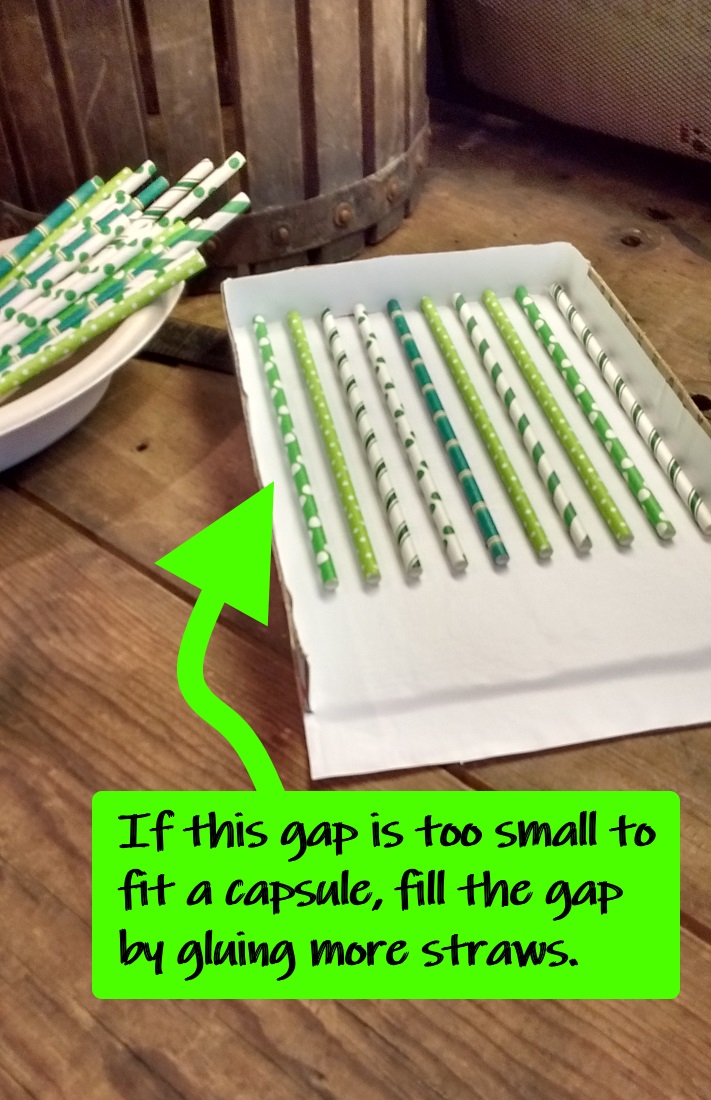
For longer straws, just butt your straws up against each other, aligning them end-to-end. There’s really no limit to the amounts of capsules you could count by adjusting the width and depth of your tray.
On to the tutorial….
Choosing Your Tray
My very first capsule counting tray was actually made using an upside down, small, lightweight, wooden Ikea drawer, 12″ x 18″. I hot glued the drinking straws down, after some trial and error with capsule width tests. It turned out to work perfectly! I used it for months, then I decided to just sell larger quantities of capsules and switched to different methods entirely.
Cardboard works great and is super easy to work with.
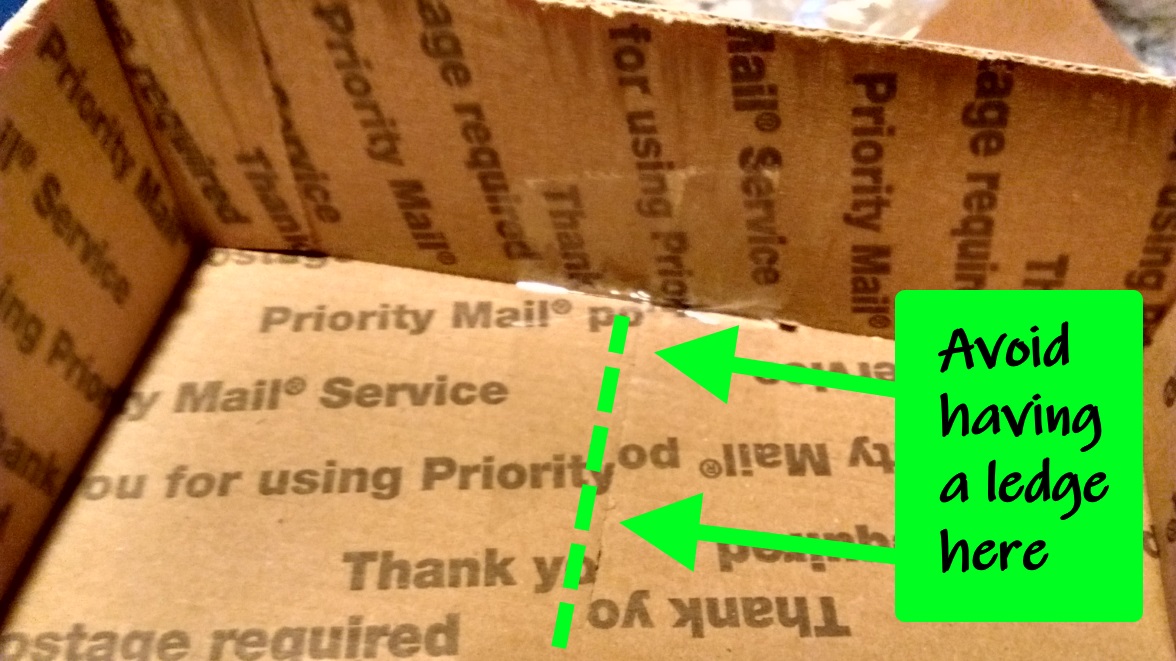
Banker’s box lids are actually perfect. They have a nice lip/edge around them so when you shake your capsules, they stay on the tray. They are usually always smooth on the inside. You NEED a flat surface for this to work, so the capsules can freely glide and slide down the rows to neatly line up for counting and multiplying.
Other Materials You Could Use
If you can’t find a banker’s box lid, the lid from a case of copy paper will work as a quick substitute. The lid from those snap together file boxes works too. Some storage containers in your home might come with a rectangular or square lid with a good edge around it. Often, after you glue your straws down to the lid, you can keep it stored on whatever container it came from when not in use. I love space-saving ideas!
If you’re still struggling for a good tray idea, how about a shirt box and/or its lid? Like the kind that you get around Christmas time from the stores for gift wrapping.
Keep the Sides Narrow, But Not Too Low
If the sides are too high, they interfere with any hand-arranging/fixing you may need to do to the capsules, making it much harder to work inside. If the sides are too low, the capsules will tumble off the sides as you wiggle the tray back and forth to settle them in place.
For Goldilocks to have her box just right, she decided to make it herself:
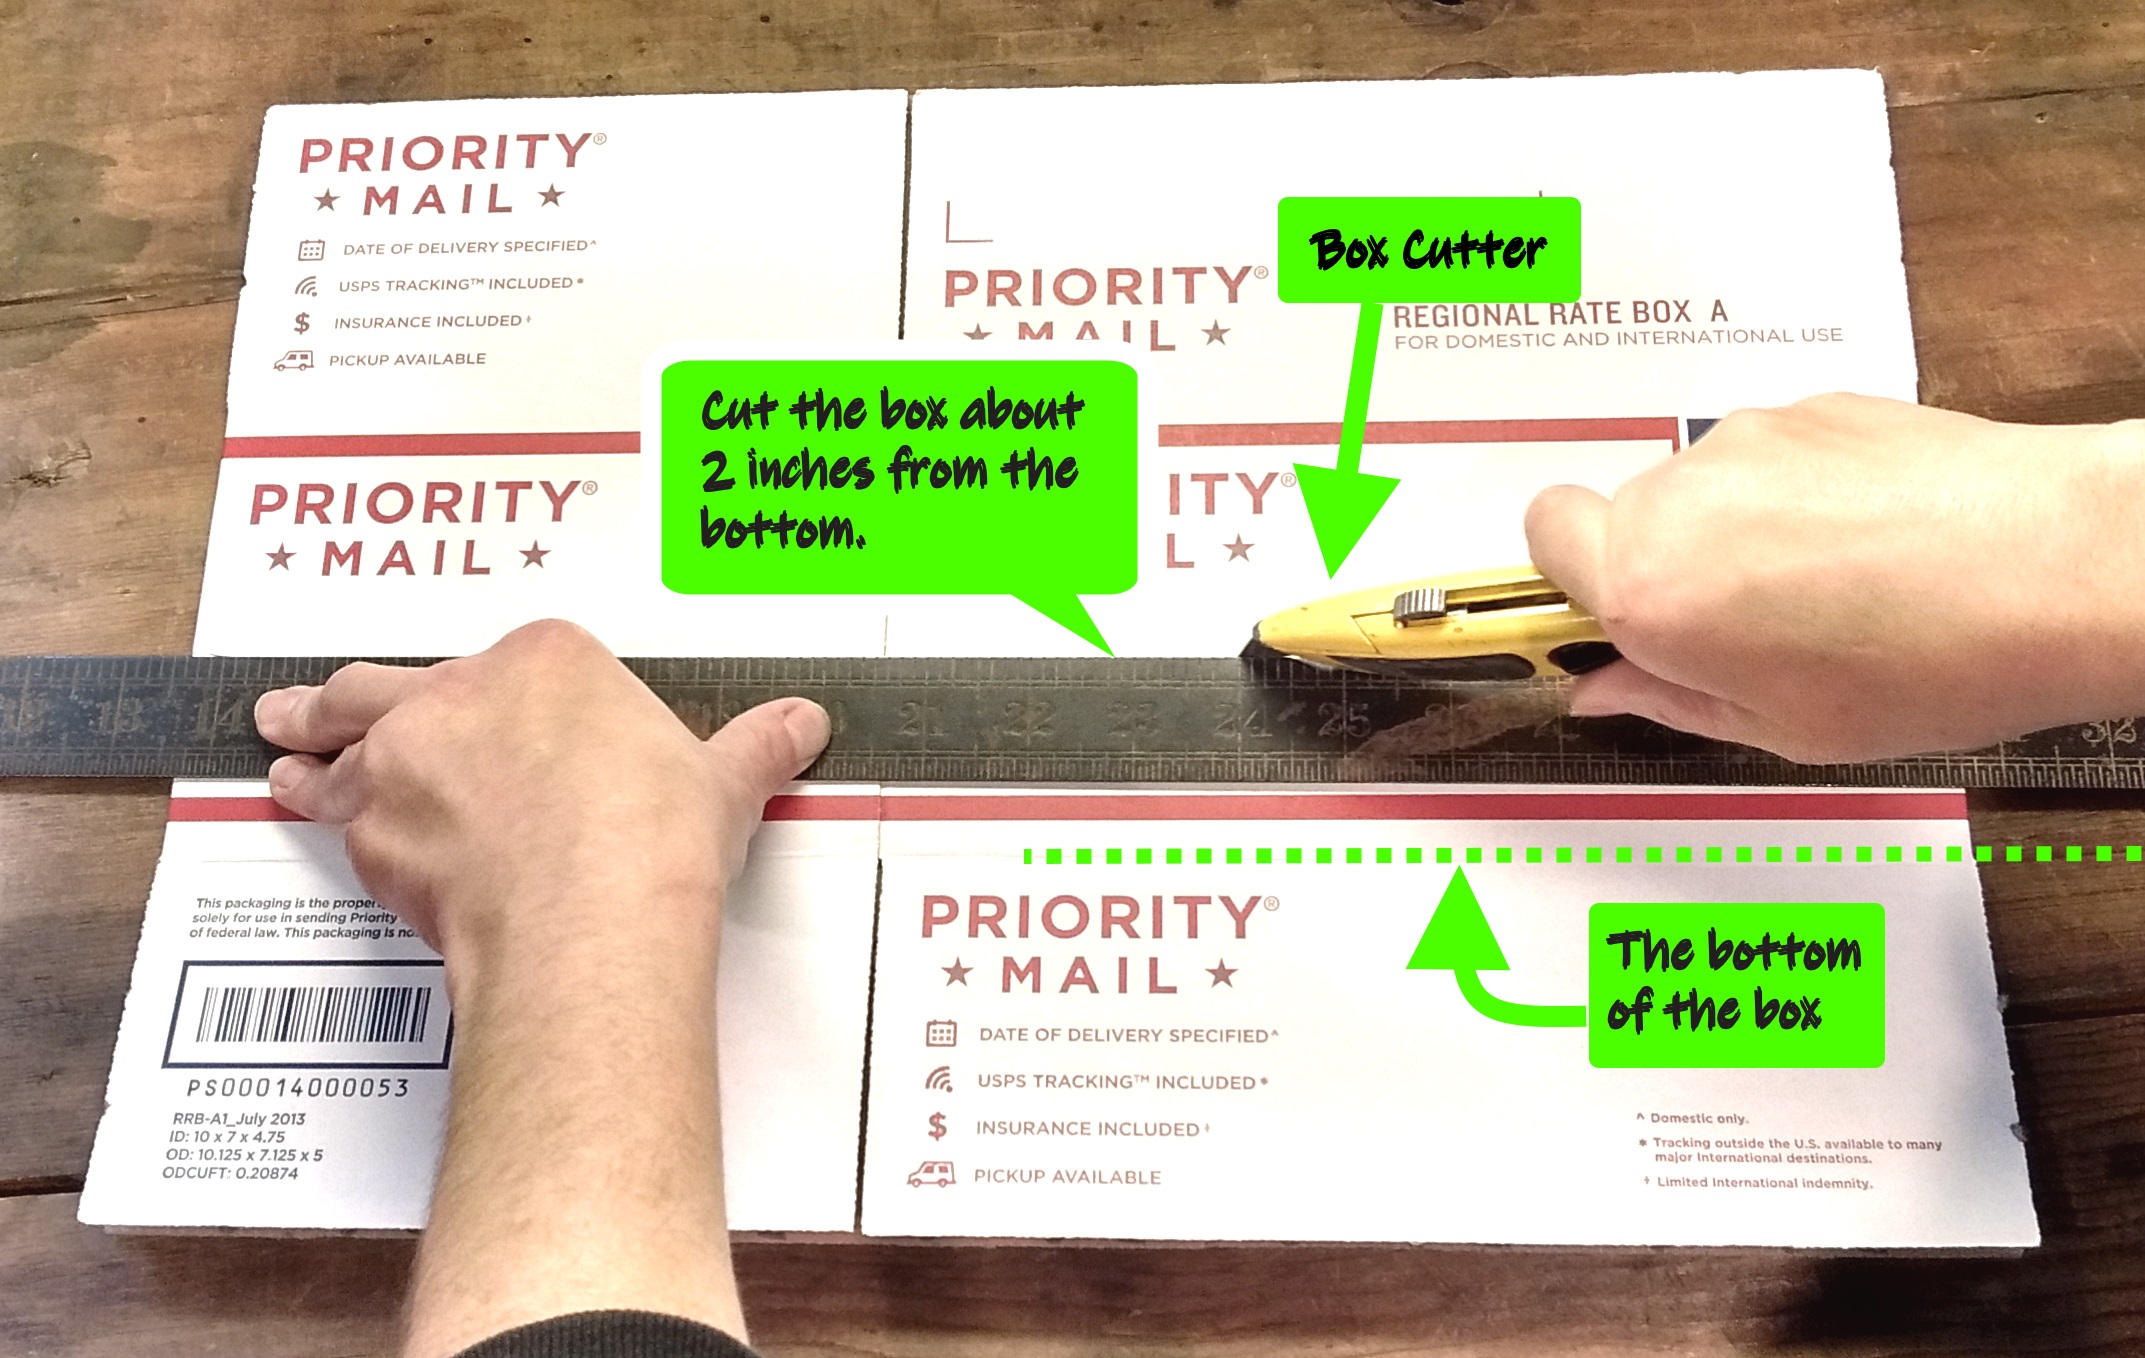
Cutting the box’s height before it is assembled is much easier than cutting down an already assembled box. A height of 2-3 inches should work well.
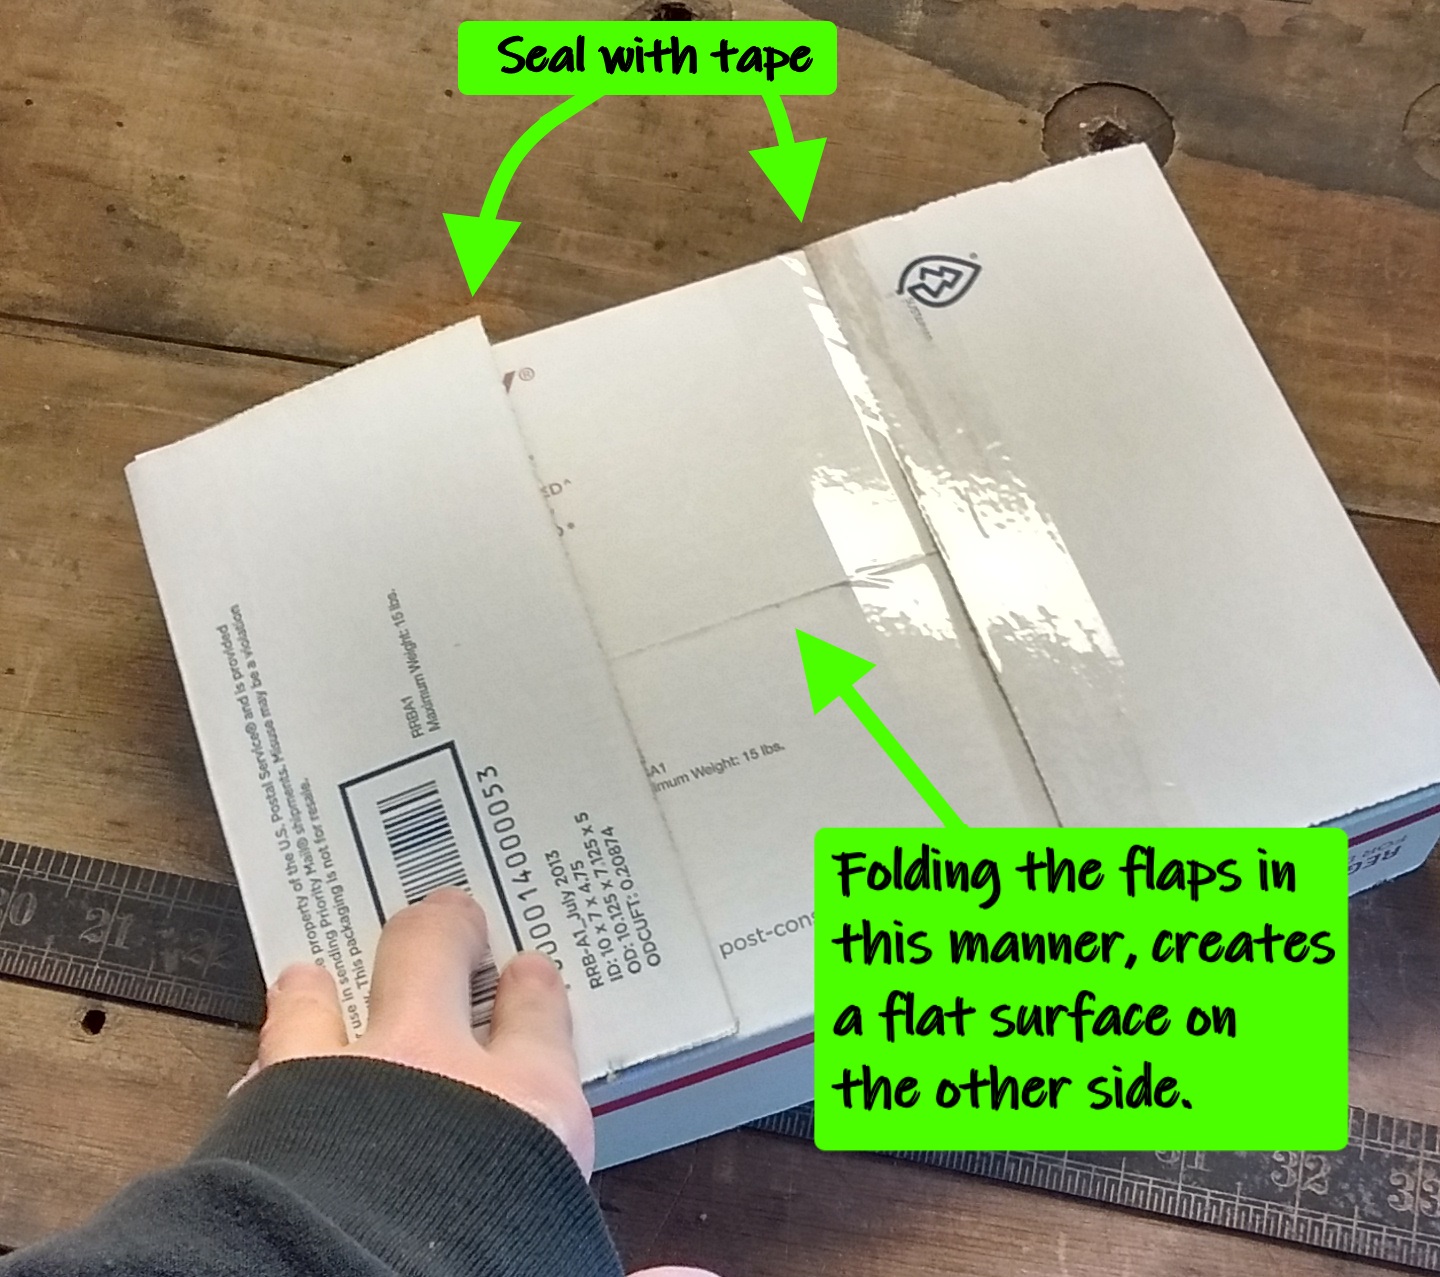
With this particular box, I was able seal the flaps in the opposite manner in which they’re supposed to go. This created a flat working surface inside the box. With an already assembled box, you may need to cut the tape, open the flaps and reset them for a smooth working surface.
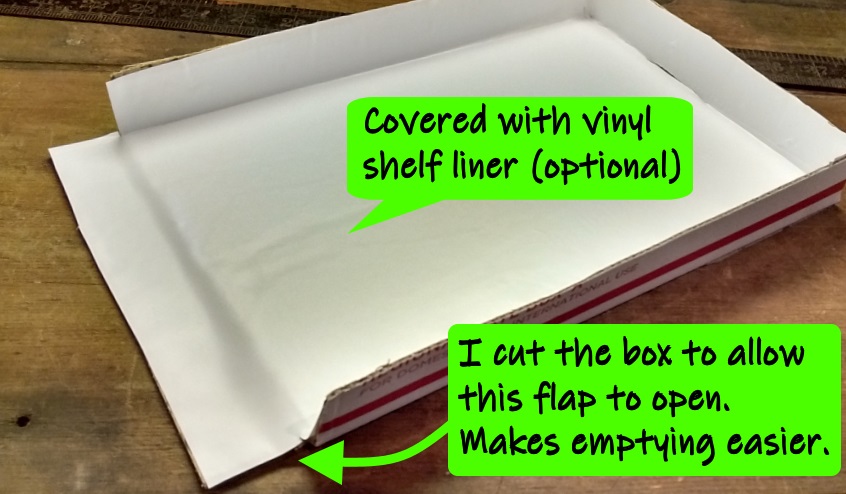
To keep the surface smooth, you could glue down some paper, use aluminum foil, or place contact paper over the surface. This part is totally optional, but it does help with smoothing an uneven surface.
I also opened up one edge of the box to allow the unused capsules an easy way out and to help when releasing the counted capsules.
Selecting the Drinking Straws
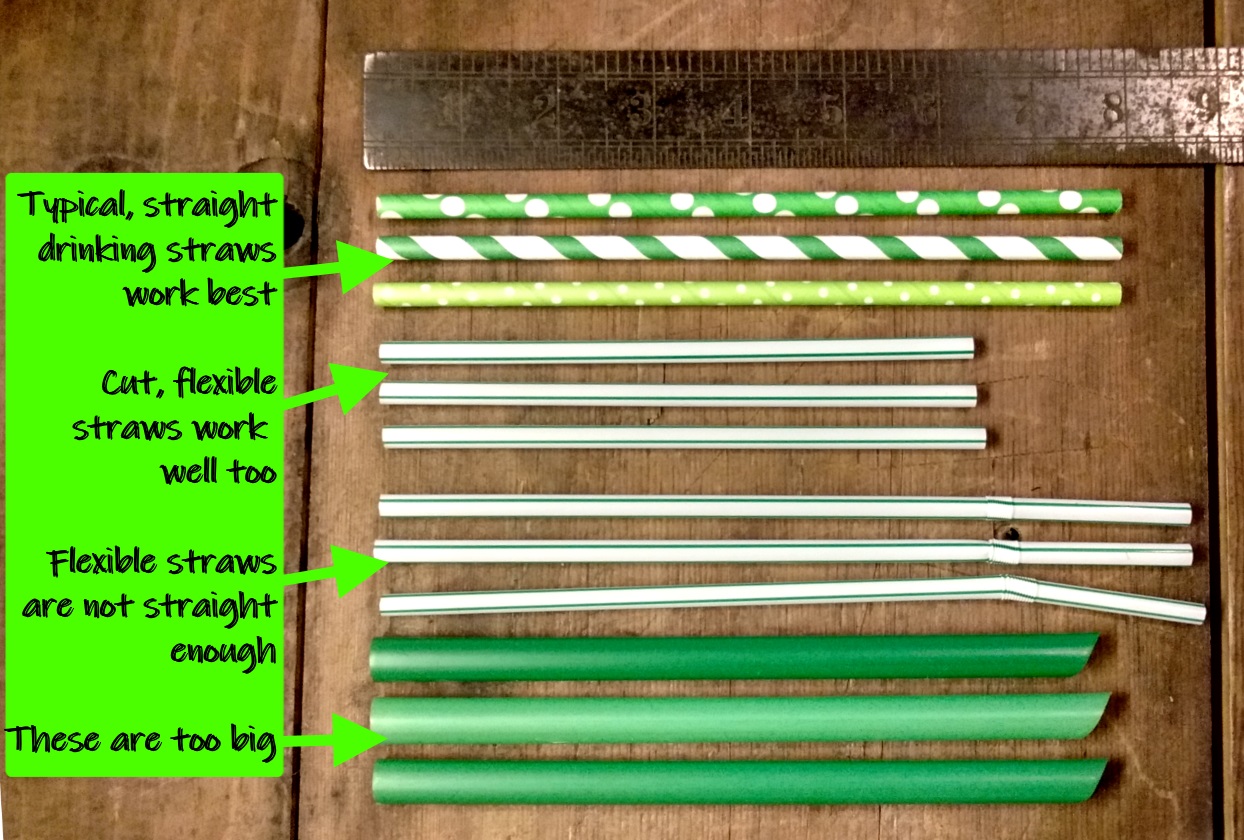
Most straws come in lengths between 7 and 9 inches and they come in varying widths. I’ve tried the wider straws and they do not work as well. The more thin or narrow the straw, the better it will work for lining up your capsules.
Flexible straws will not work well in this application either because consistently straight lines are necessary, but if that’s all you have, they can be easily modified to work. Cut them just below the flexible part, a straight cut is best. Discard the flexible part or find something fun to do with them. If your straws are now too short, take another straw (or piece) and butt it up against the first one. That is why a straight cut is nice.
Either paper or plastic straws will work fine for this project, but be sure to choose a complimentary adhesive for the two surfaces.
Speaking of Adhesive
Glue guns are one of my favorite inventions. I choose mine over household glue 9 times out of 10, so whenever I have a glue-able moment, a glue gun is my go-to item. That being said, it’s not so great with this project UNLESS you are really good at being precise and not messing up, like at all. Because hot glue, now cold, does not clean up easily, especially in a small space, such as between delicately-placed straws.
Your straws need close-to-exact parallel alignment. You want your capsules to be able to slide easily up and down the channels between the rows. This makes the lineup and release go smoothly. If there are any hot glue remnants in the channels, the capsules will get hung up and mess up the process. If you’re going this route regardless, hold your straws vertically, instead of the natural instinct of horizontal, when applying the glue. This way when the glue runs a little, it will run along the bottom of the straw and not encroach up the sides of the straw, which would again, impede the sliding capsules.
Also, if using a glue gun, a contact paper surface will clean up better than a cardboard surface, making it a little easier to work with.
Alternately, you could place the straws onto a very thin line of hot glue. That would make for a very clean process. The caveat is you need to pre-plan your line placement and draw them in place. I will not go into the logistics of that here because it varies for different size straws and capsule sizes and it’s kind of a pain in the neck. If you don’t mind doing that kind of thing, your capsule counter is going to be nicer and more well made than mine.
Slower Than Hot Glue, but Easier to Work With
A tacky glue can work perfectly in this project. It’s like an Elmer’s white glue, but thicker and dries a bit faster. If you have a favorite glue you like to work with, then have at it. It doesn’t really matter except faster setting is advantageous. Also, if using a white glue, you will need more spacers to keep the straws from rolling back before they’re the glue’s completely set.
Now Begin
Start by gluing your first straw against one side of the tray. Use AAA batteries to space your straws and continue gluing.
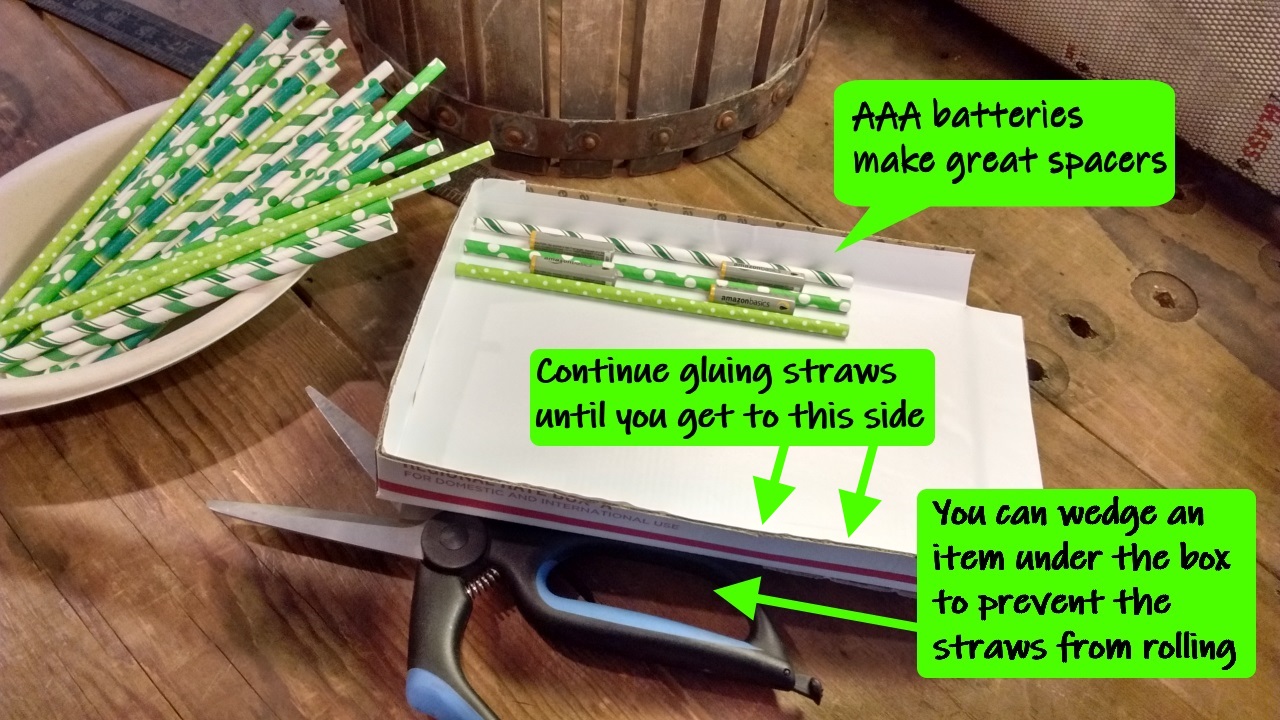
To Make Your Rows Longer
It’s so easy to cut and glue a few more pieces of straw and line them up end to end.
By the way, if you’re wondering about the straws I used, I found them on Amazon. They are paper straws, but are extremely stiff and super-easy to work with. I couldn’t resist the fun assortment of patterns!
To Use Your Capsule Counting Tray
Simply dump a small pile of capsules onto the tray, like so..
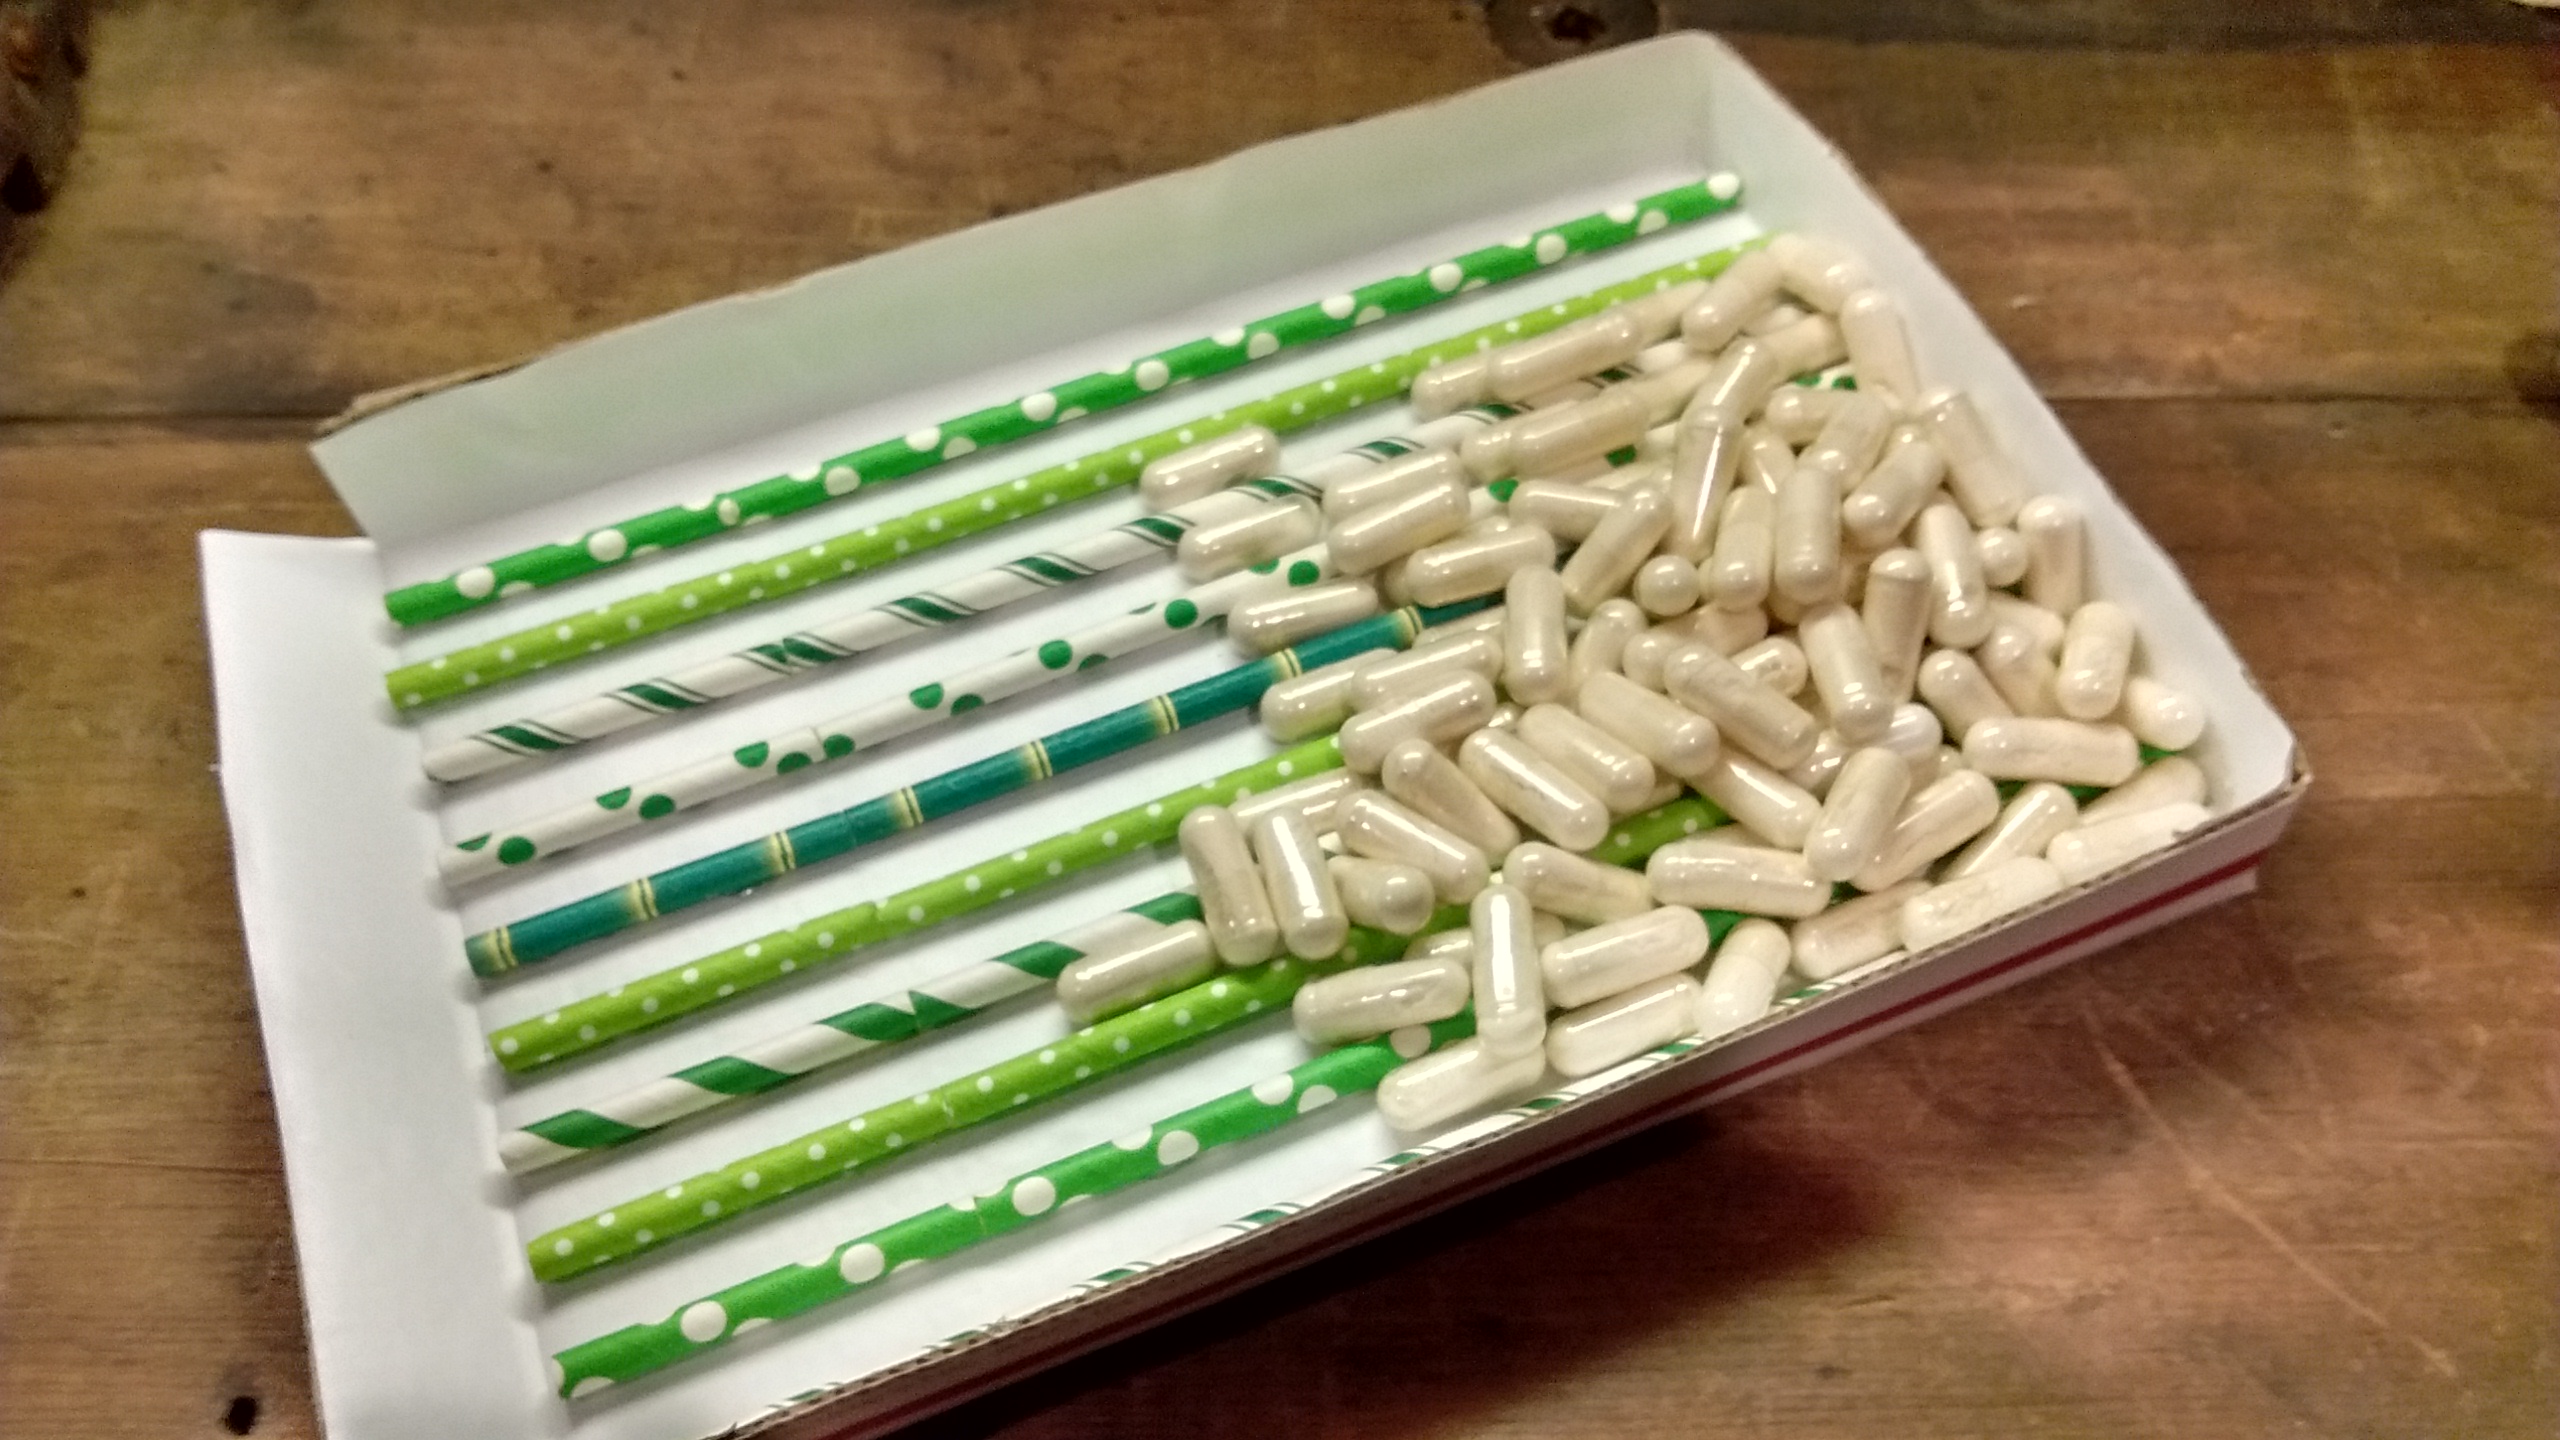
Wiggle the unit from side to side so capsules can jump the straws to find a vacant spot.
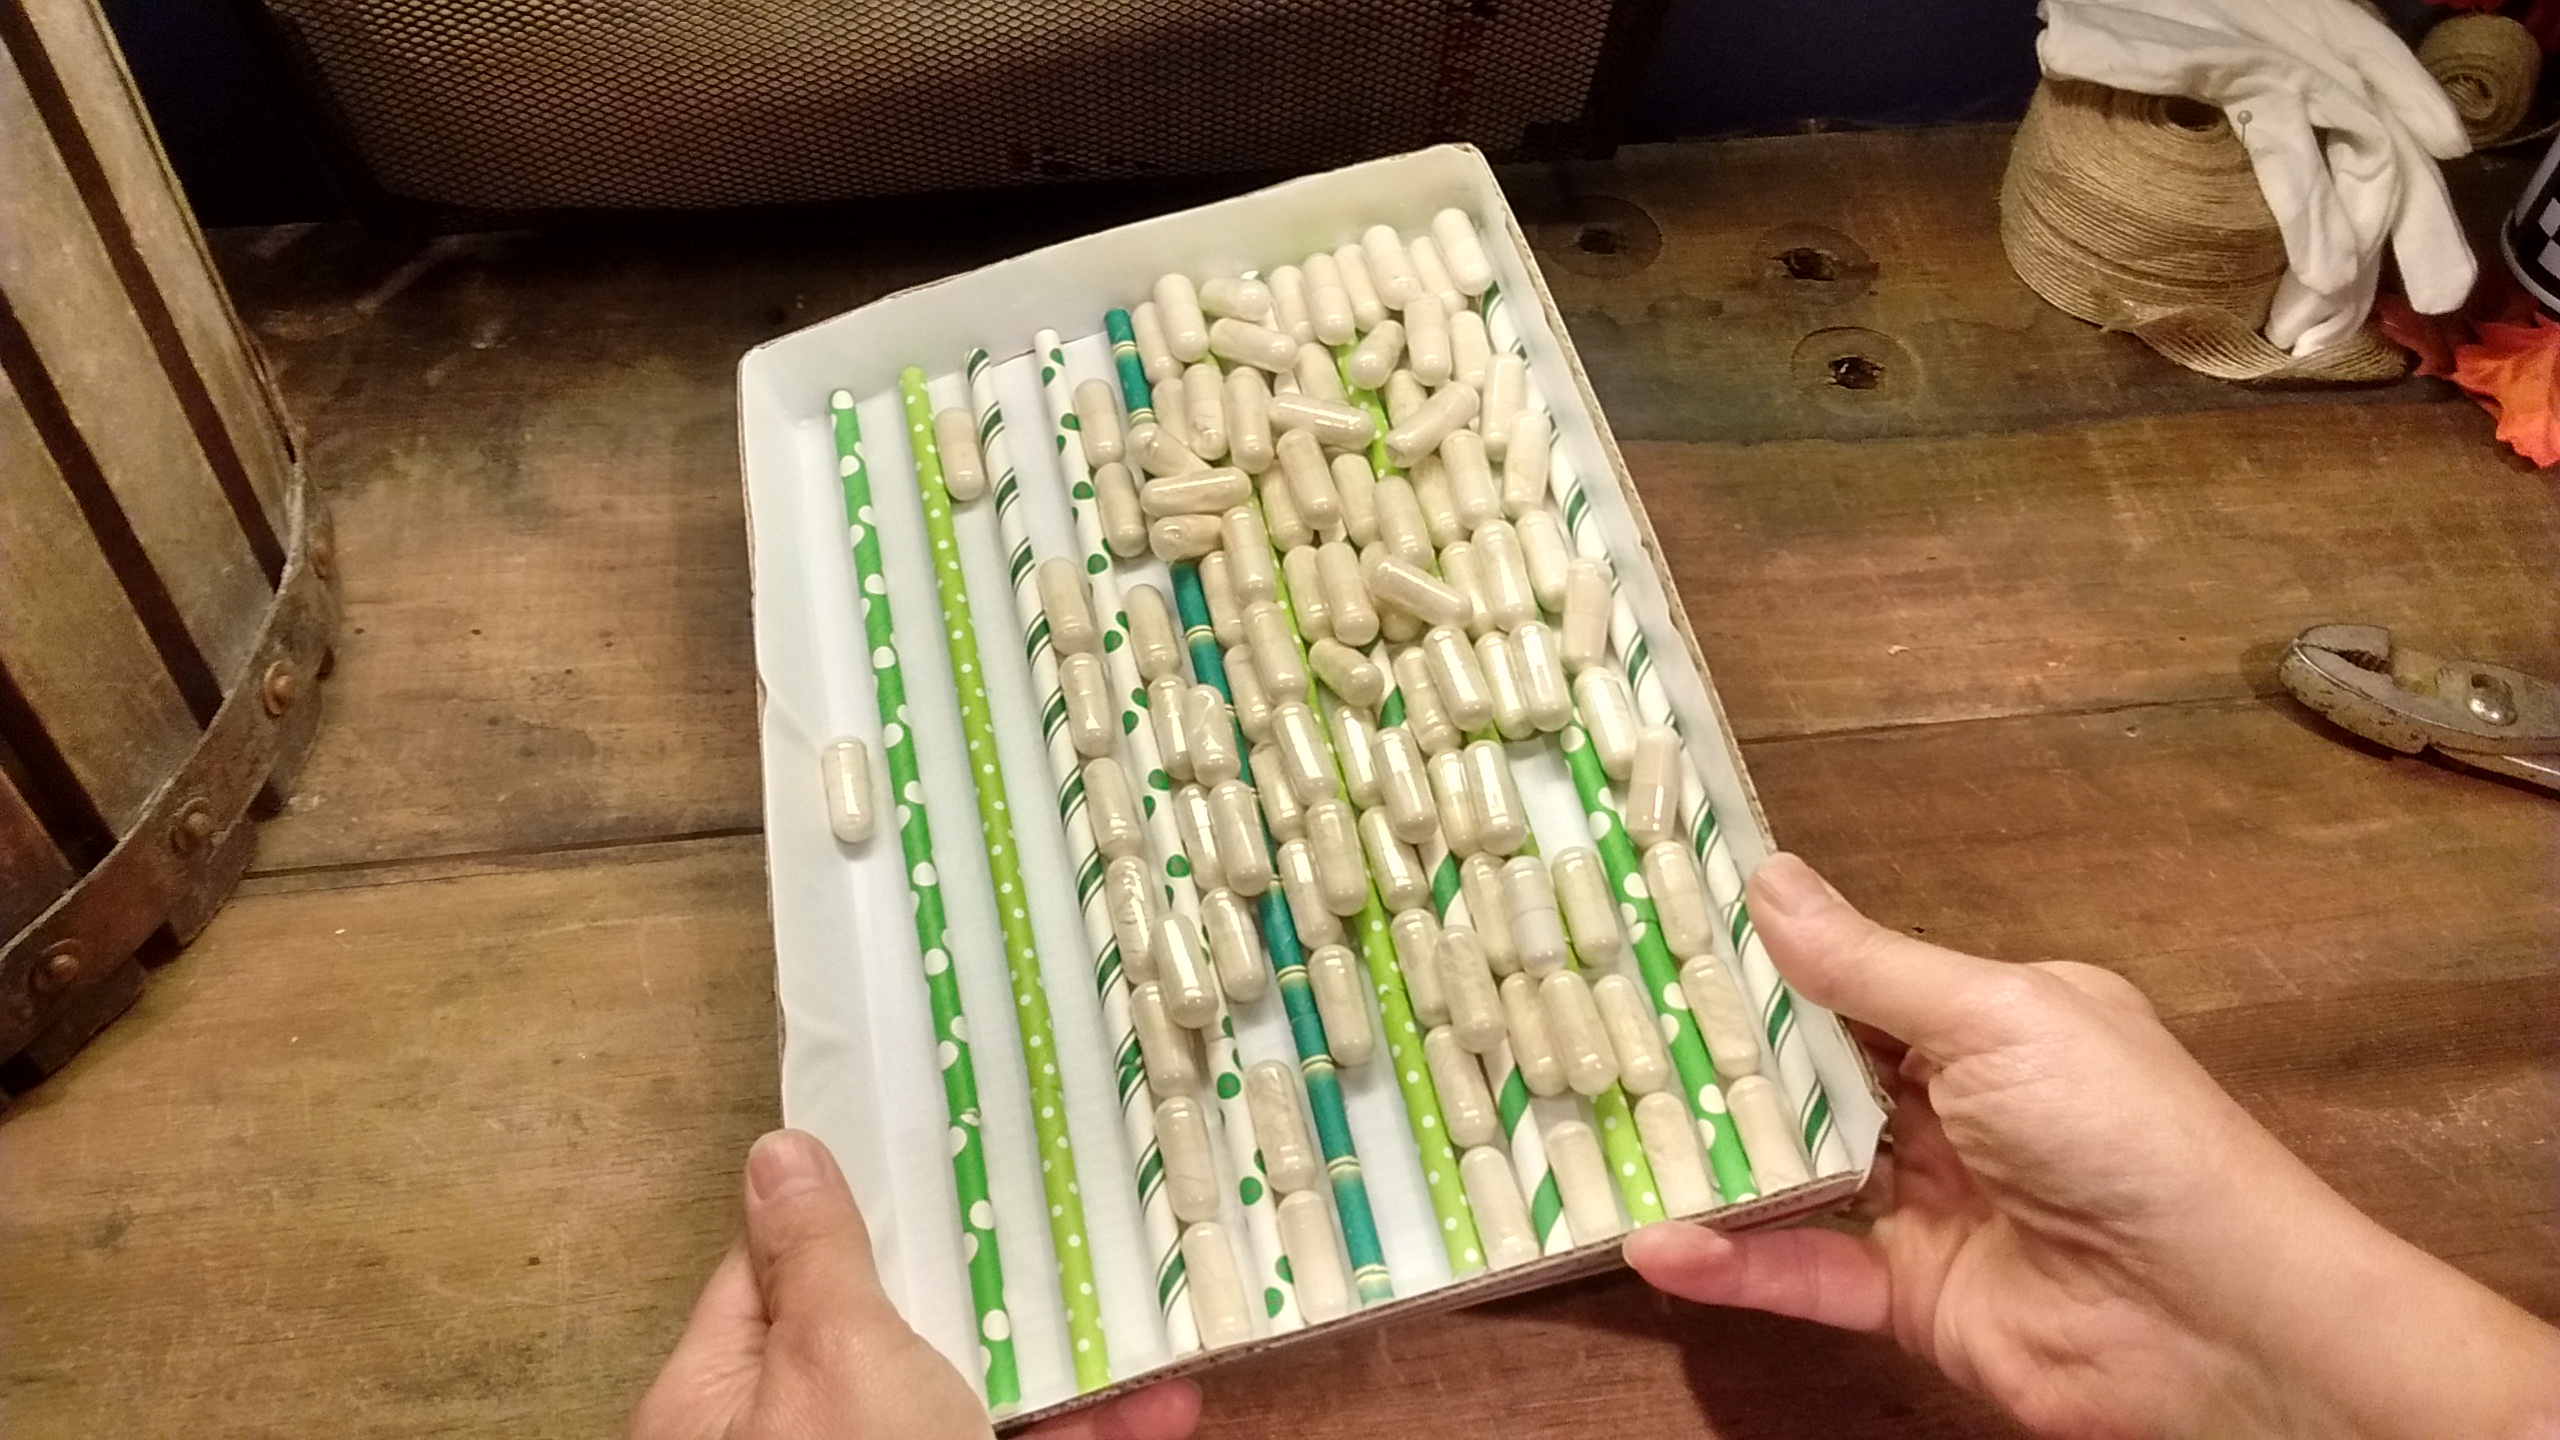
Continue to gently shuffle it until they fall into place. Push off the excess capsules.
When you’re done, capsules slide out easily because of the flap.
This tray that I made will fit 90 size 000 capsules, a 90-day supply. It was loaded, shaken, and cleared in well under a minute without any counting! A great time saver for a monotonous job.
Recent Comments