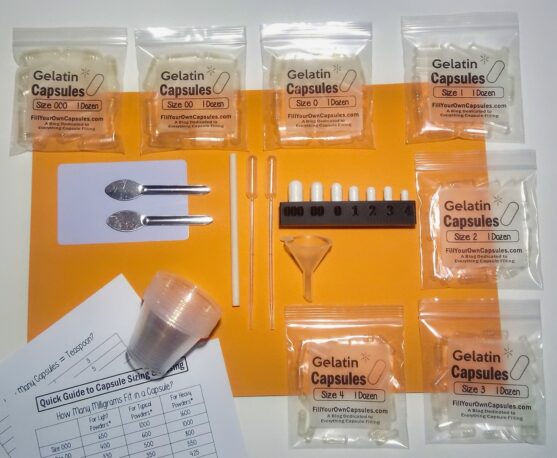
For lack of a better name, I am calling this capsule filler the Plexiglass Filler because of the material it is made of. This filling machine is available on Amazon, eBay, and I also saw it on AliExpress. It’s constructed of Plexiglass sheets and manufactured in China. It’s available under a few different brand names, the one I purchased was a Dailyloop. I’ve also seen it branded as Keenso, Nukraft, and Yuuu. It can be found in 100-hole and 187-hole and for capsule sizes 2, 1, 0, 00, and ooo.
The instructions that are included are fairly clear, with small photographs to guide you. I actually needed a magnifying glass to see them clearly. If you follow their instructions to the letter, you may run into some problems. That’s why I’m breaking it down, step by step, and showing you how to improve your technique for this specific machine. If you follow my recommendations, the capsule-filling process will go faster and with much less mess.
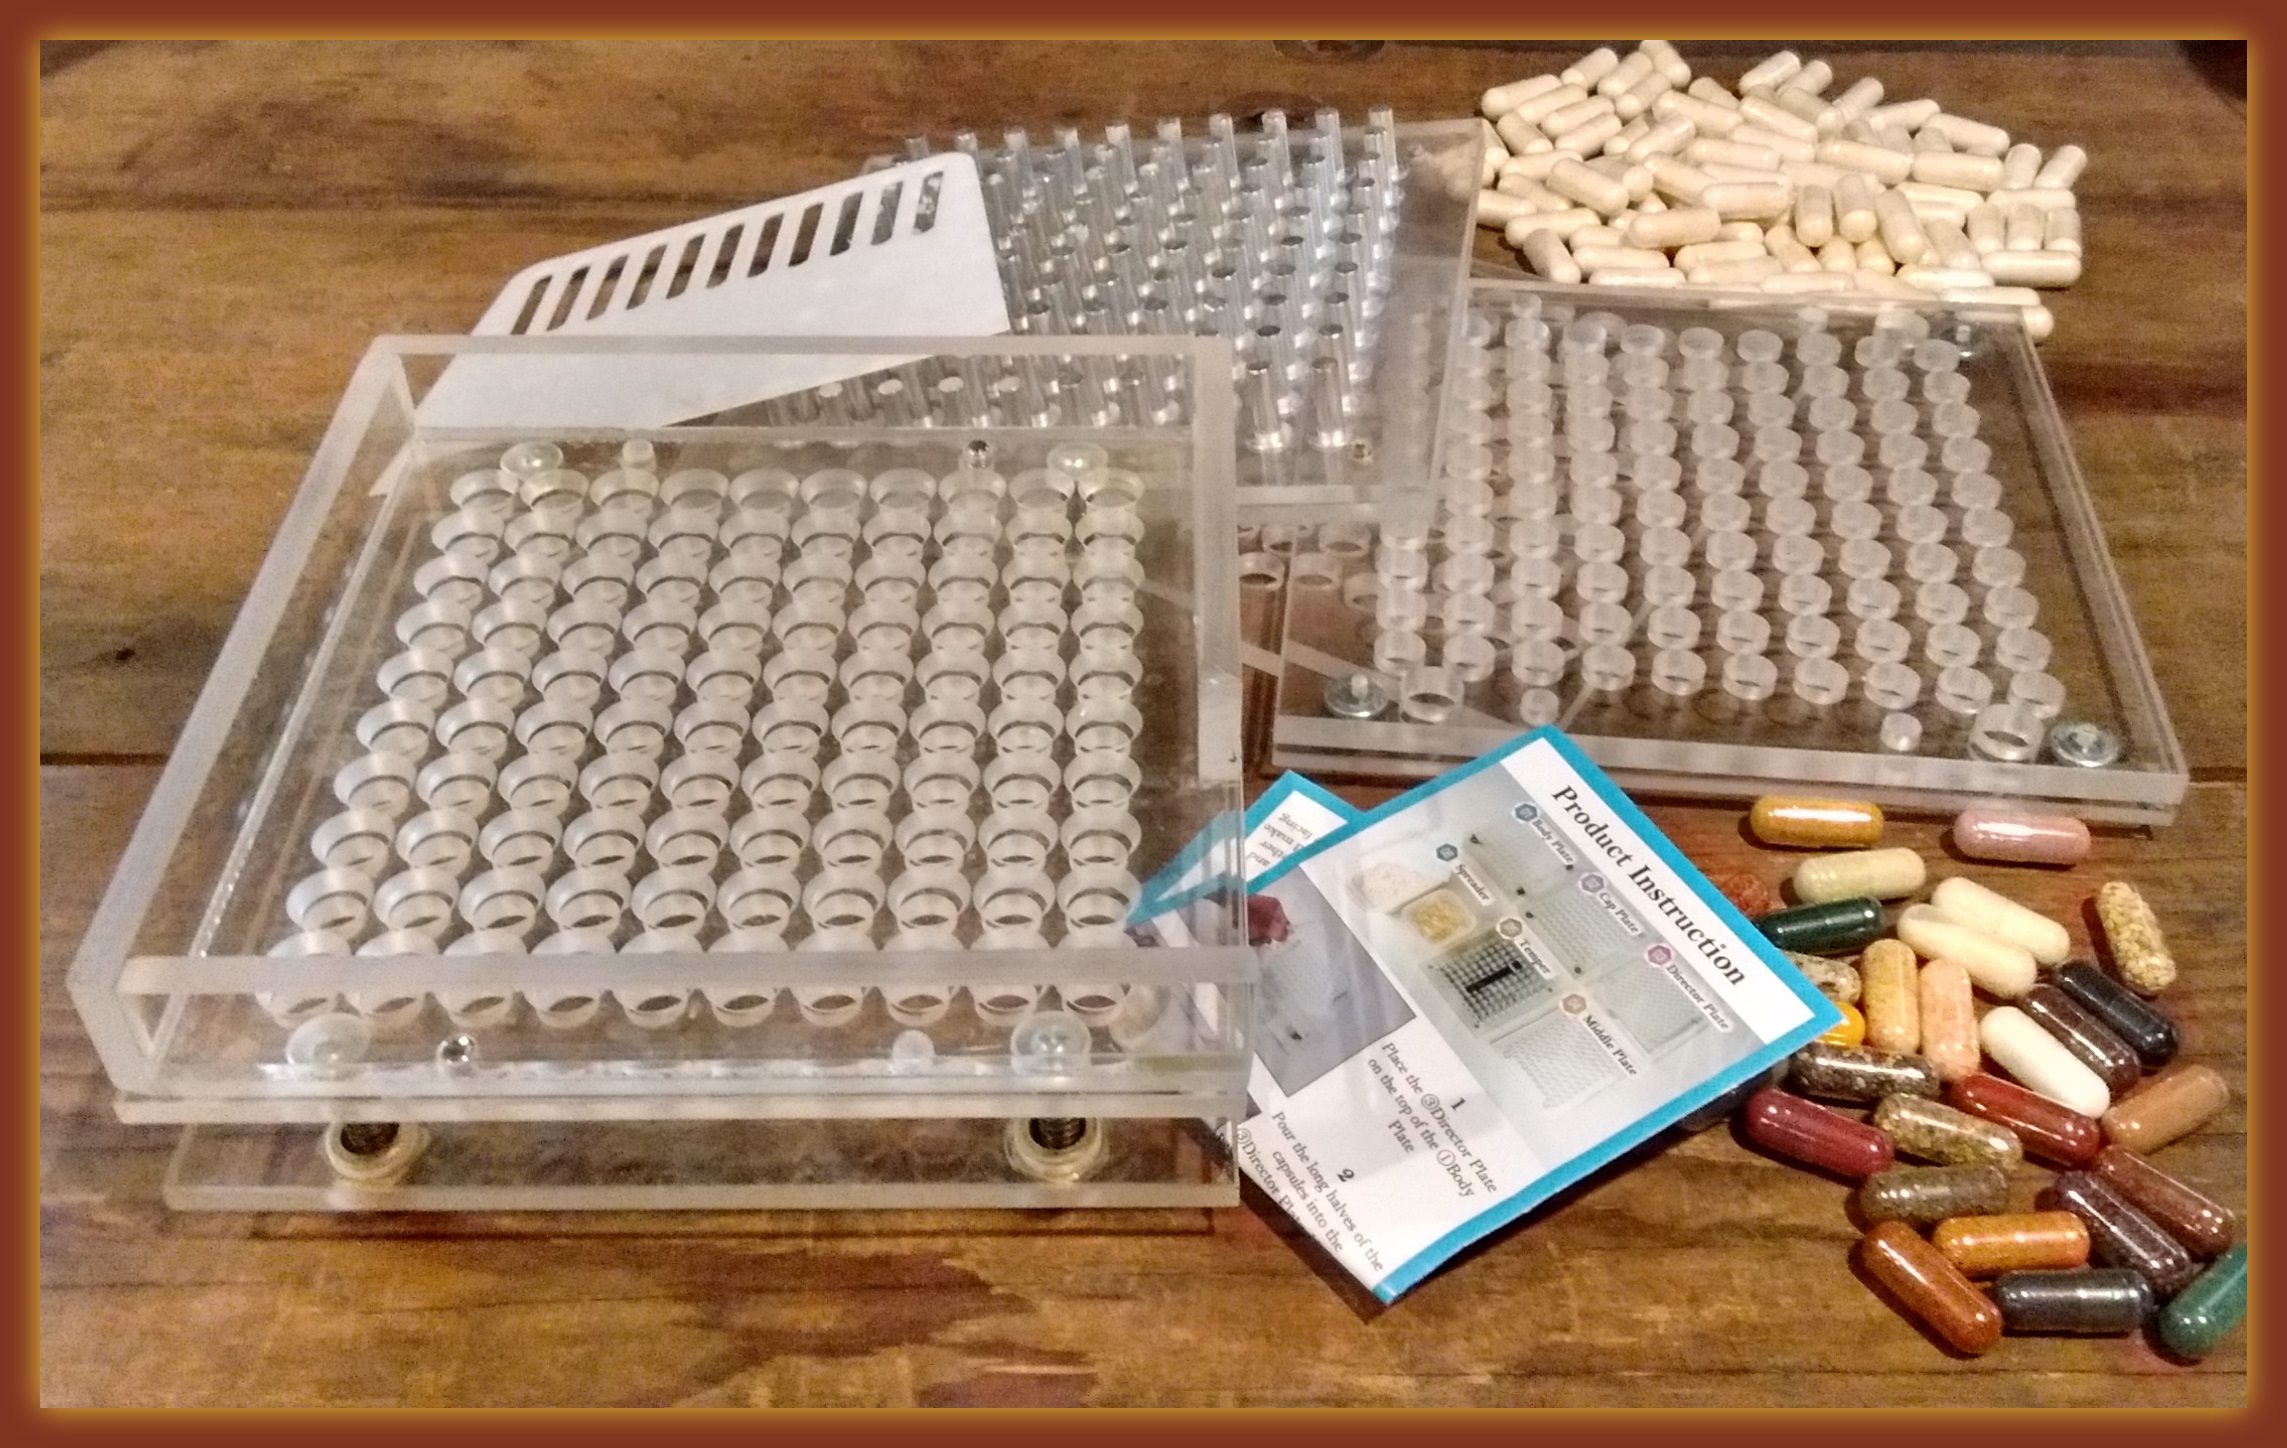
Familiarize Yourself With the Parts
To help reduce any confusion, my very first recommendation is to label or number the parts as you set up the machine. Here’s an image from the manufacturer to assist you.

Now although they provide a photo of the parts, it is still confusing because at first glance, the parts look pretty similar. I’m going to help you identify them and set up.
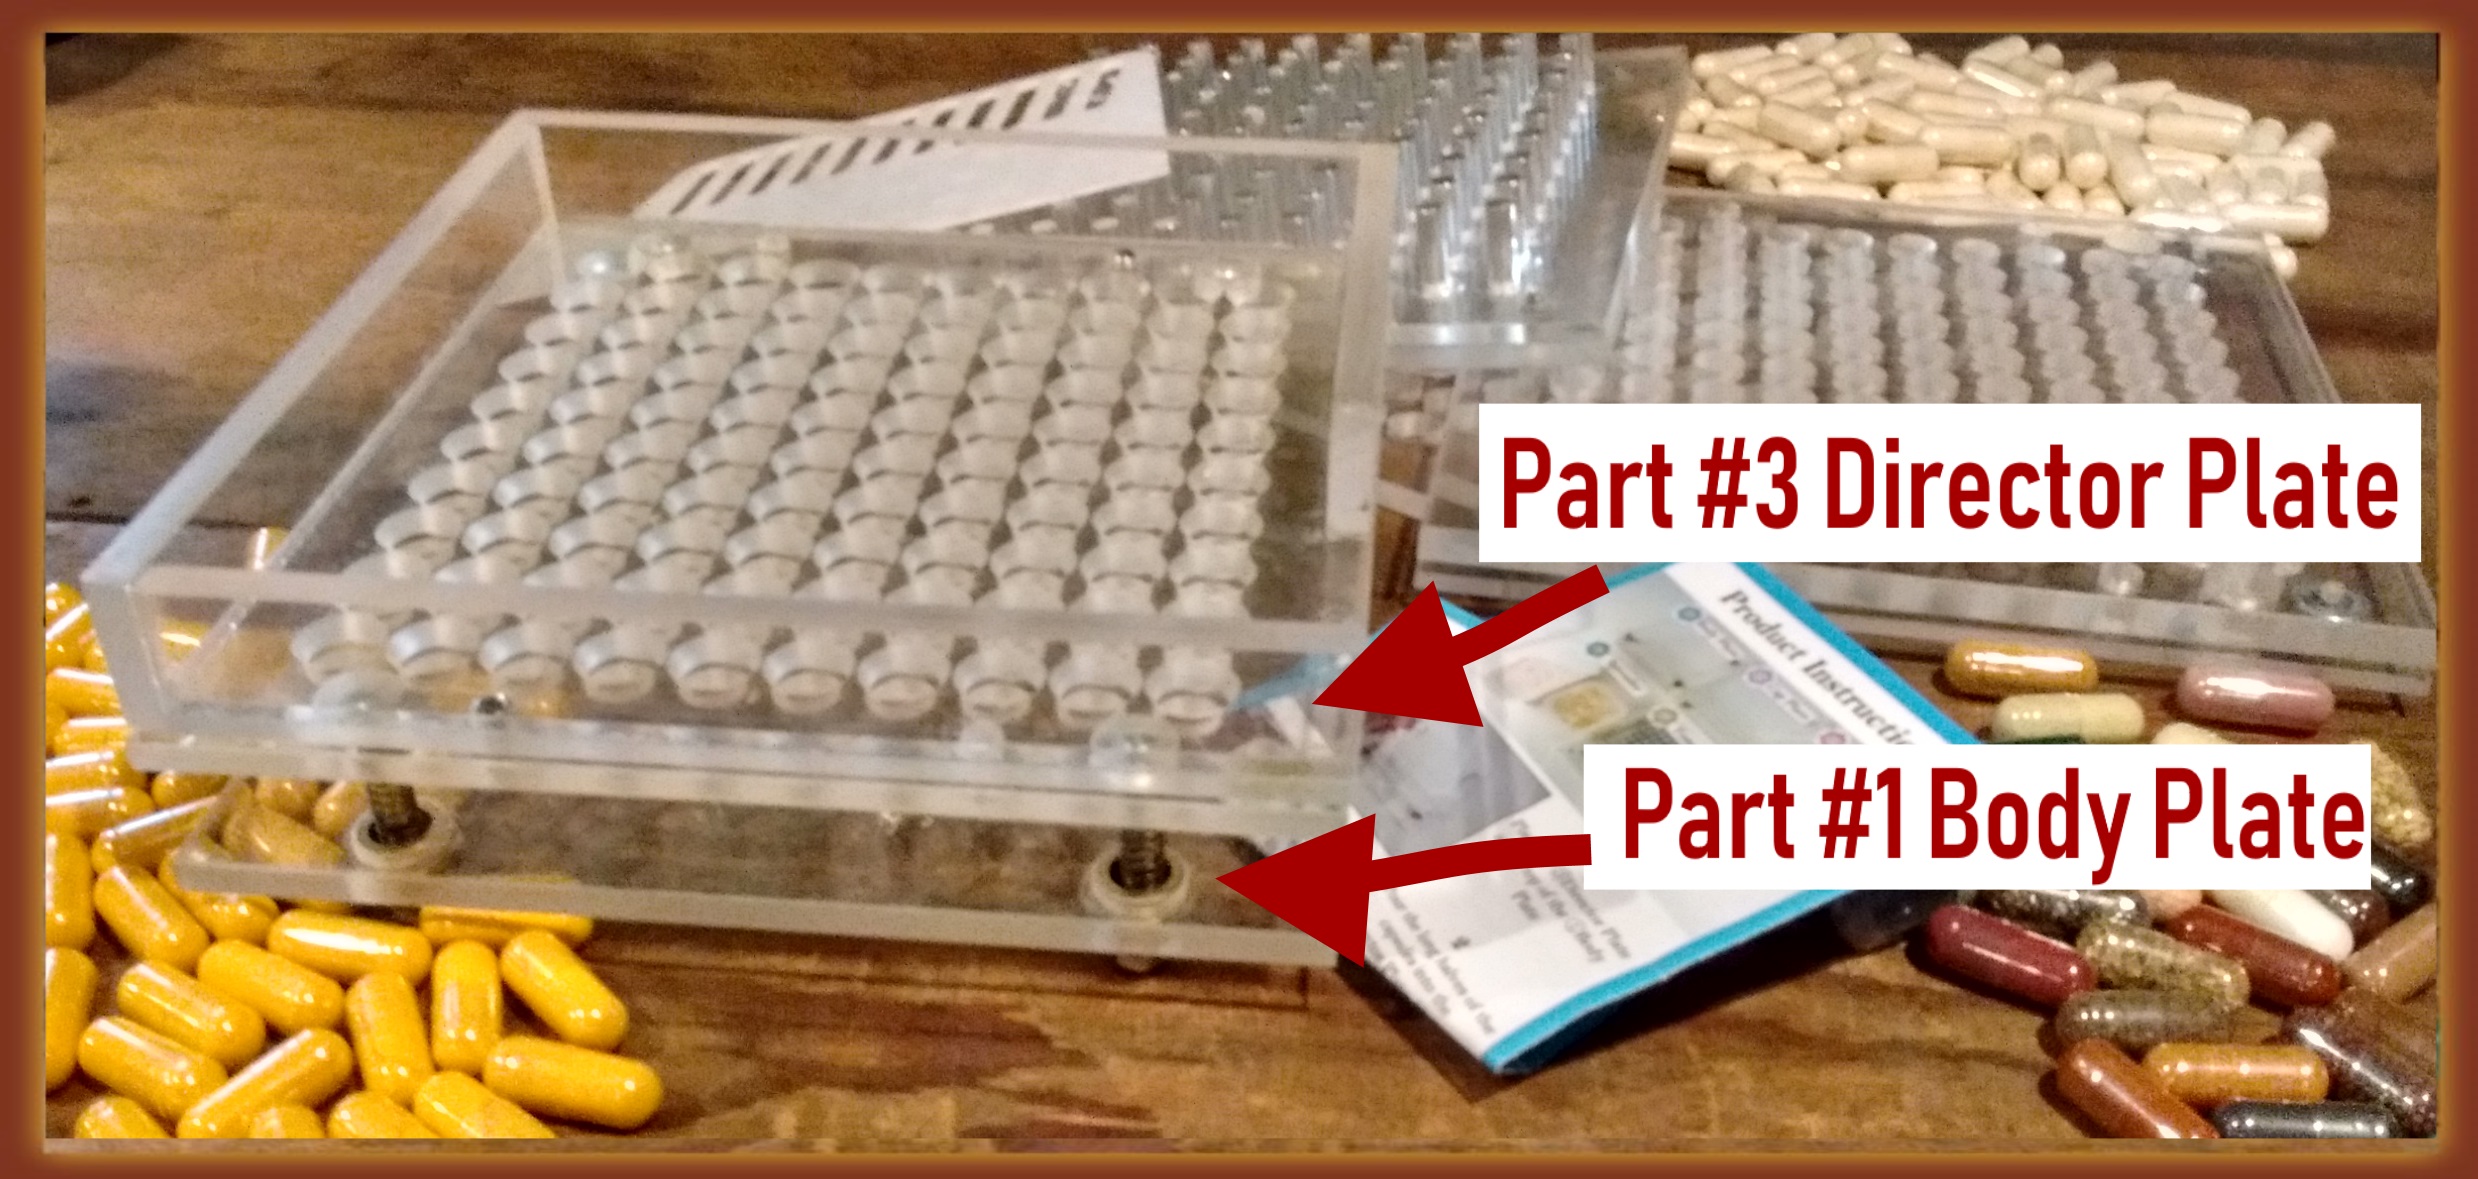
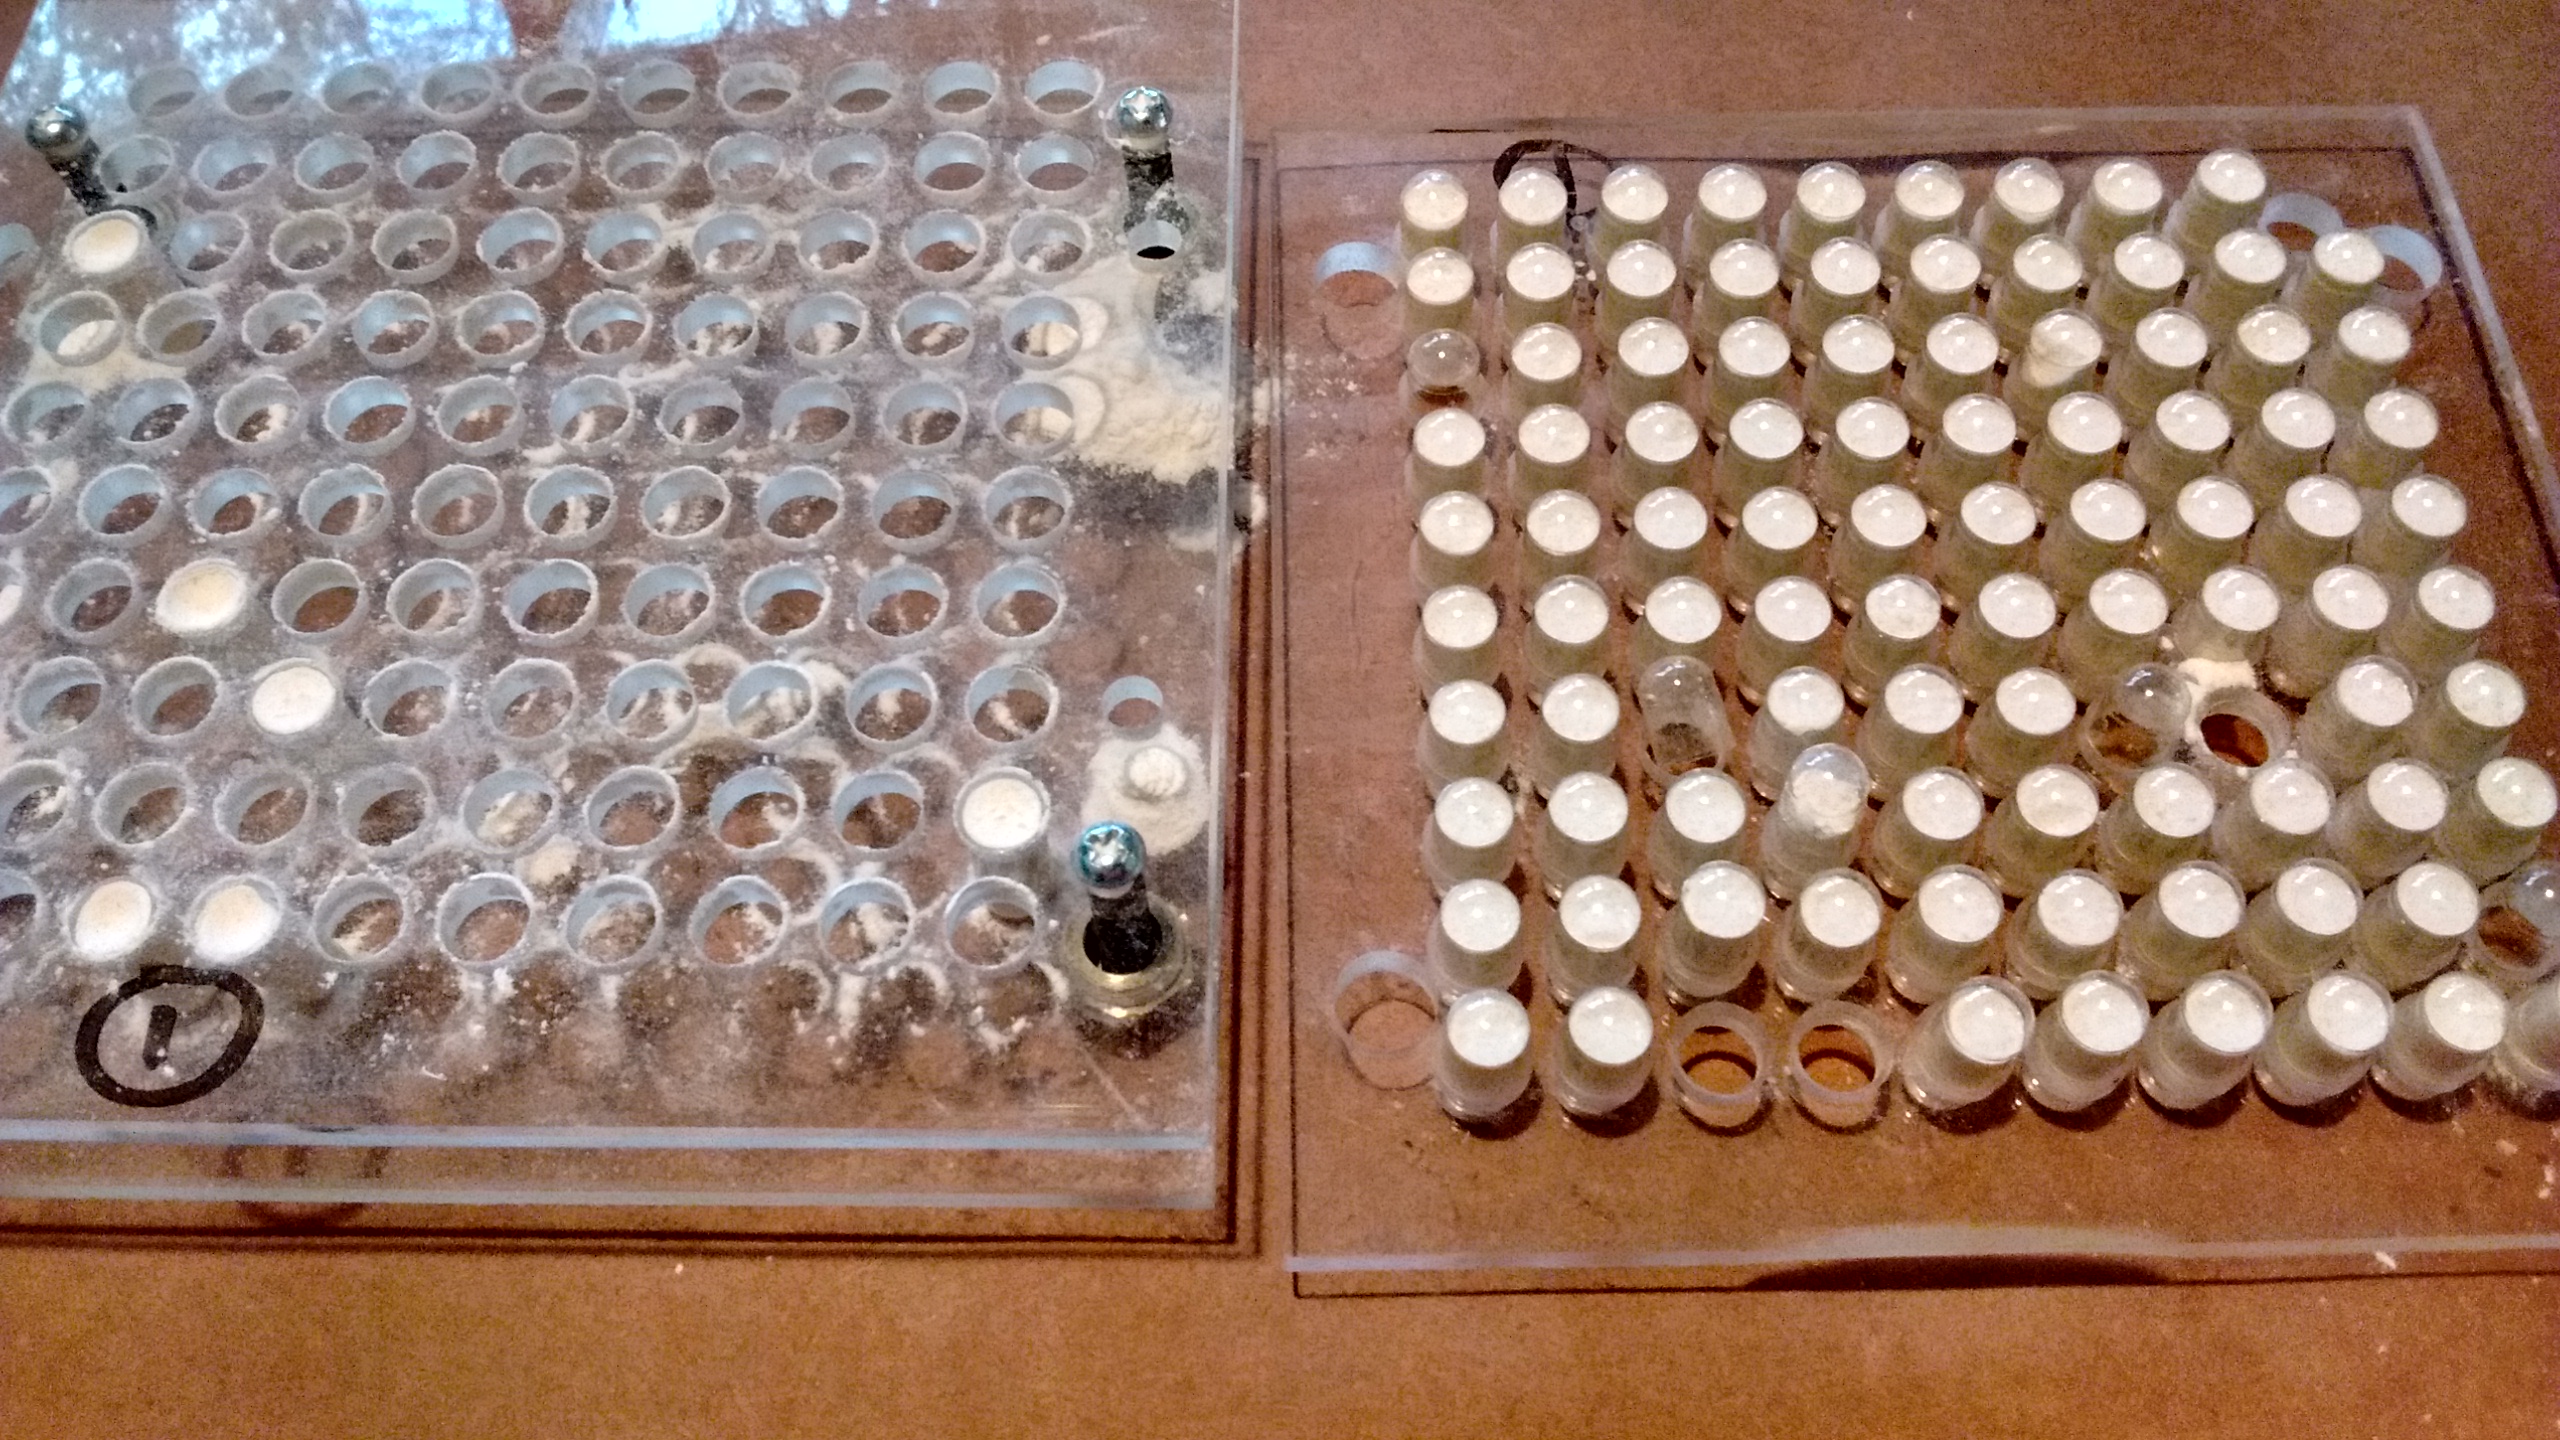
Part #1 Body Plate:
This is the layer that is made with 2 pieces that are attached to each other with springs. This is your base where the filling action happens. It holds the capsule body, which is the larger, bottom piece of the capsule.
Part #2 Cap Plate:
This piece looks like some others. Identify it by the metal bolts in each corner. It will hold the caps of your capsules (the top, smaller piece).
Part #3 Director Plate:
This piece is distinguishable by the shallow sides that surround it. This is used as an insertion guide for the capsules and with my tip later, you’ll see how it can be used to reduce the mess.
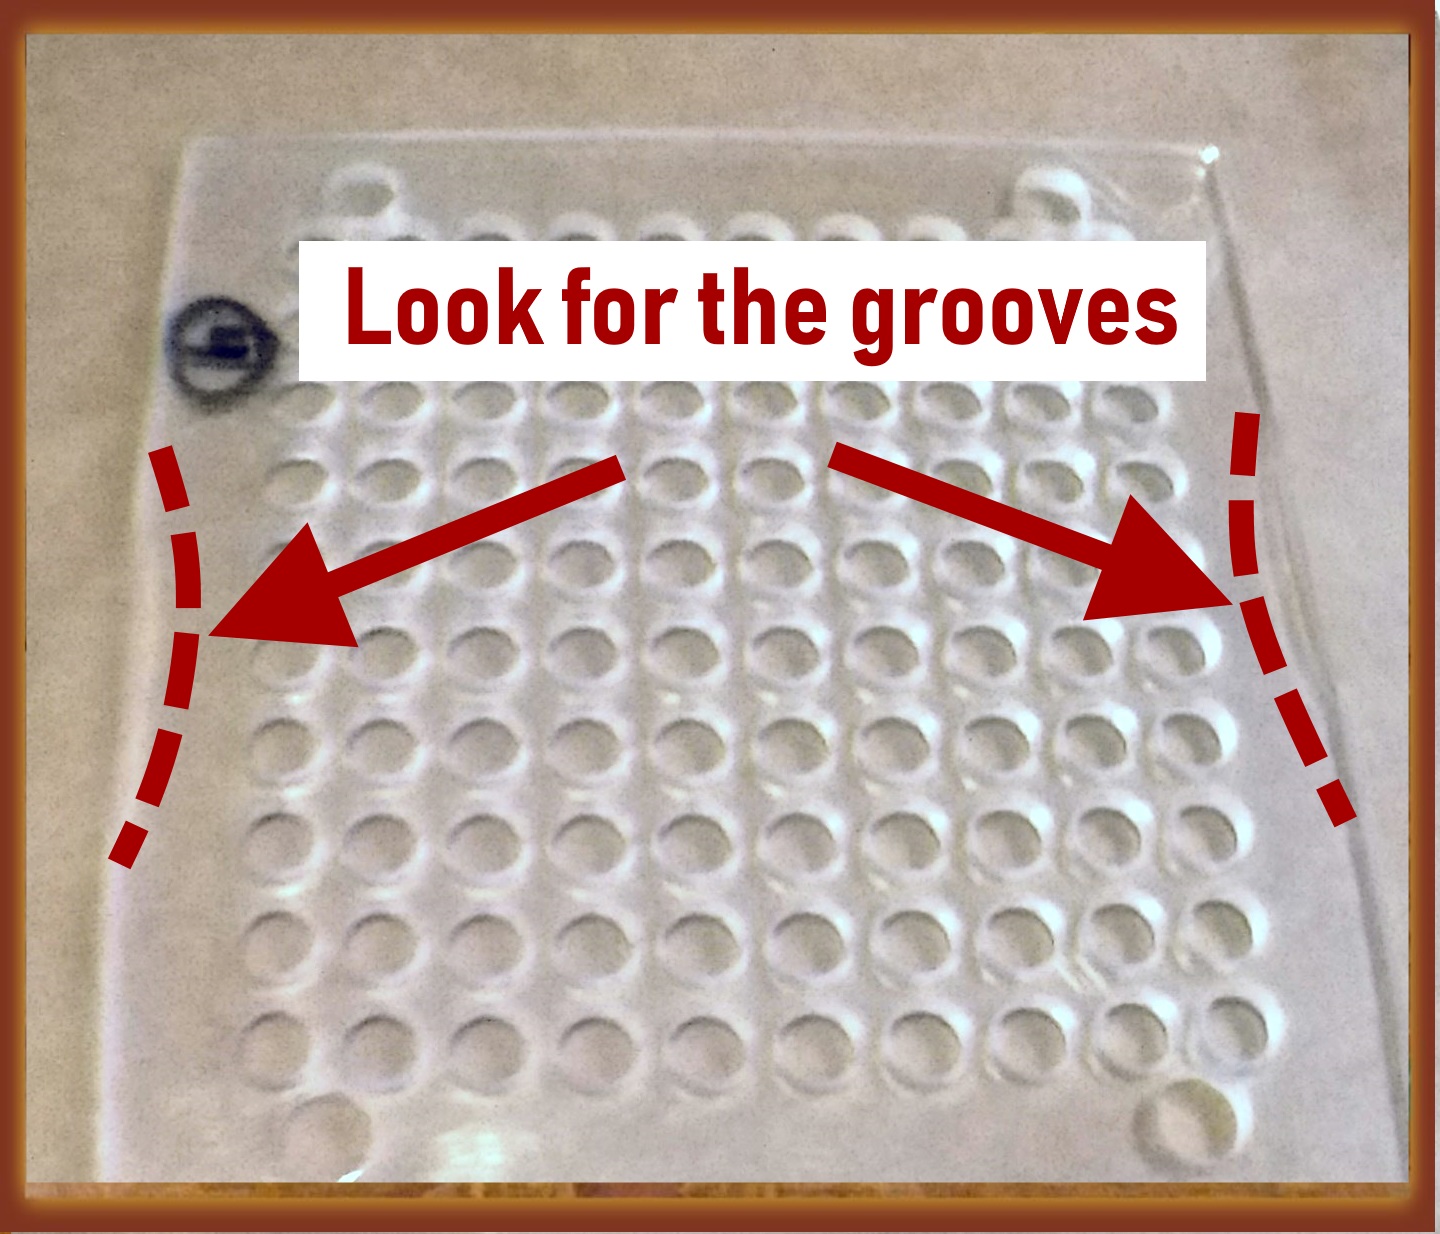
Part #4 Middle Plate:
This piece, which looks like some of the others, can be identified by the grooves that have been shaved from 2 edges. Make sure the grooves are facing up.
Part #5 The Tamper
The instructions call it the temper. This is the piece with 100 little pegs. It is used to pack the powder down into the capsule, so you can fit more. Mine came packaged with the handle unattached. The screws are already in place, so you just have to remove and reinsert them to screw the handle down with a Phillips screwdriver.
Part #6 The Spreader
This the white plastic tool that you use to smear the powder around with. You will use this to load the capsules with the powder.
Again, I am going to recommend that you label these pieces before you start. You can use a Sharpee Marker, an erasable marker, sticker labels, or as some recommend, carving the numbers permanently, so that they don’t wash off. Either way, after you’ve identified and organized all your parts, you’re ready to move to the next step.
Set Up Your Workspace
In working with this particular machine, I’ve concluded that it is one of the messiest capsule fillers I’ve ever used. That’s not to say it can’t be somewhat contained, following my tips should help with that.
Get a large, plastic or silicone place mat or tray to work on. You could even spread out a small newspaper.
Gather the following parts:
Part #1 Body Plate
Part #2 Cap Plate
Part #3 Director Plate
Align and place Part #3 on top of Part #1.
Preparing Your Empty Capsules
This part can go one of two ways….
Situation A: In an ideal world, you would have known to purchase separated capsules. The tops and the bottoms of the capsules come packaged separately and are ideal for use in the Plexiglass Filling Machine. If you have these, congratulations, you get to skip down to the part that says Loading Your Pre-Separated Capsules.
Situation B: Just like most of us, you have the capsules that come assembled. These are the most common types of capsules available and chances are, that’s what you’re using today. If that’s the case, you get to do an extra step. You will have to separate your capsules before you go any further. But don’t separate them just yet!
Let me just explain a little about the process of loading capsules before we begin. Ideally, you would just dump a bunch of capsule bottoms onto the Director Plate, shake it around a bit, and the capsules would fall into the holes, you than discard the excess. My first time using this machine, I separated 100 capsules and then poured them over the holes and shook it. It took FOREVER to get the bottoms to fall into the holes. This is because it is meant to be used with a giant scoop of capsule bottoms, it seems that the over-abundance of pieces helps them fall in. Without this abundance, the process doesn’t work properly and is a huge time waster. You would probably have to separate 300 capsules to get this affect and that seems like an even bigger time waster to me.
The Quickest Way to Load Pre-Assembled Capsules
This might sound counter-productive, but I recommend that you separate and then load each capsule one at a time. Yes, I know this sounds like more work. It did to me too, but I timed it and this way is definitely more efficient. The process is actually very easy.
Place the Part #1/Part #3 combo near your left hand and place the Part #2 near your right hand. When you first pick up the capsule, feel for the ridge and align the capsule in your fingers so that the large part is on the left side and the smaller, top, is on the right side. With a horizontal action, pull the capsule apart. With your left hand, place the larger piece of capsule in the first hole of the Director Plate. With your right hand, place the smaller piece of capsule in the first hole of the #2 Cap Plate. My estimate is that it would take between 1 and 2 seconds to do each capsule. On average, it should take you about 2 minutes.
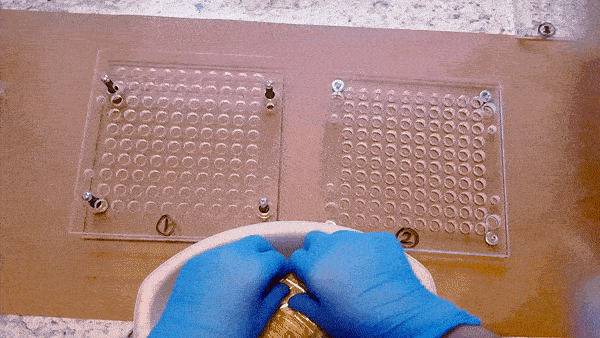
Loading Your Pre-Separated Capsules
If you are loading bulk separated capsules, you’ve got it a little easier. Dump a cup or two of capsule bottoms onto the Director Plate. Cover the side opening with your hand and shake the machine back and forth to allow the capsules to fall into the holes. When it looks like you’re done, uncover the side opening and pour the excess pieces back into your container.
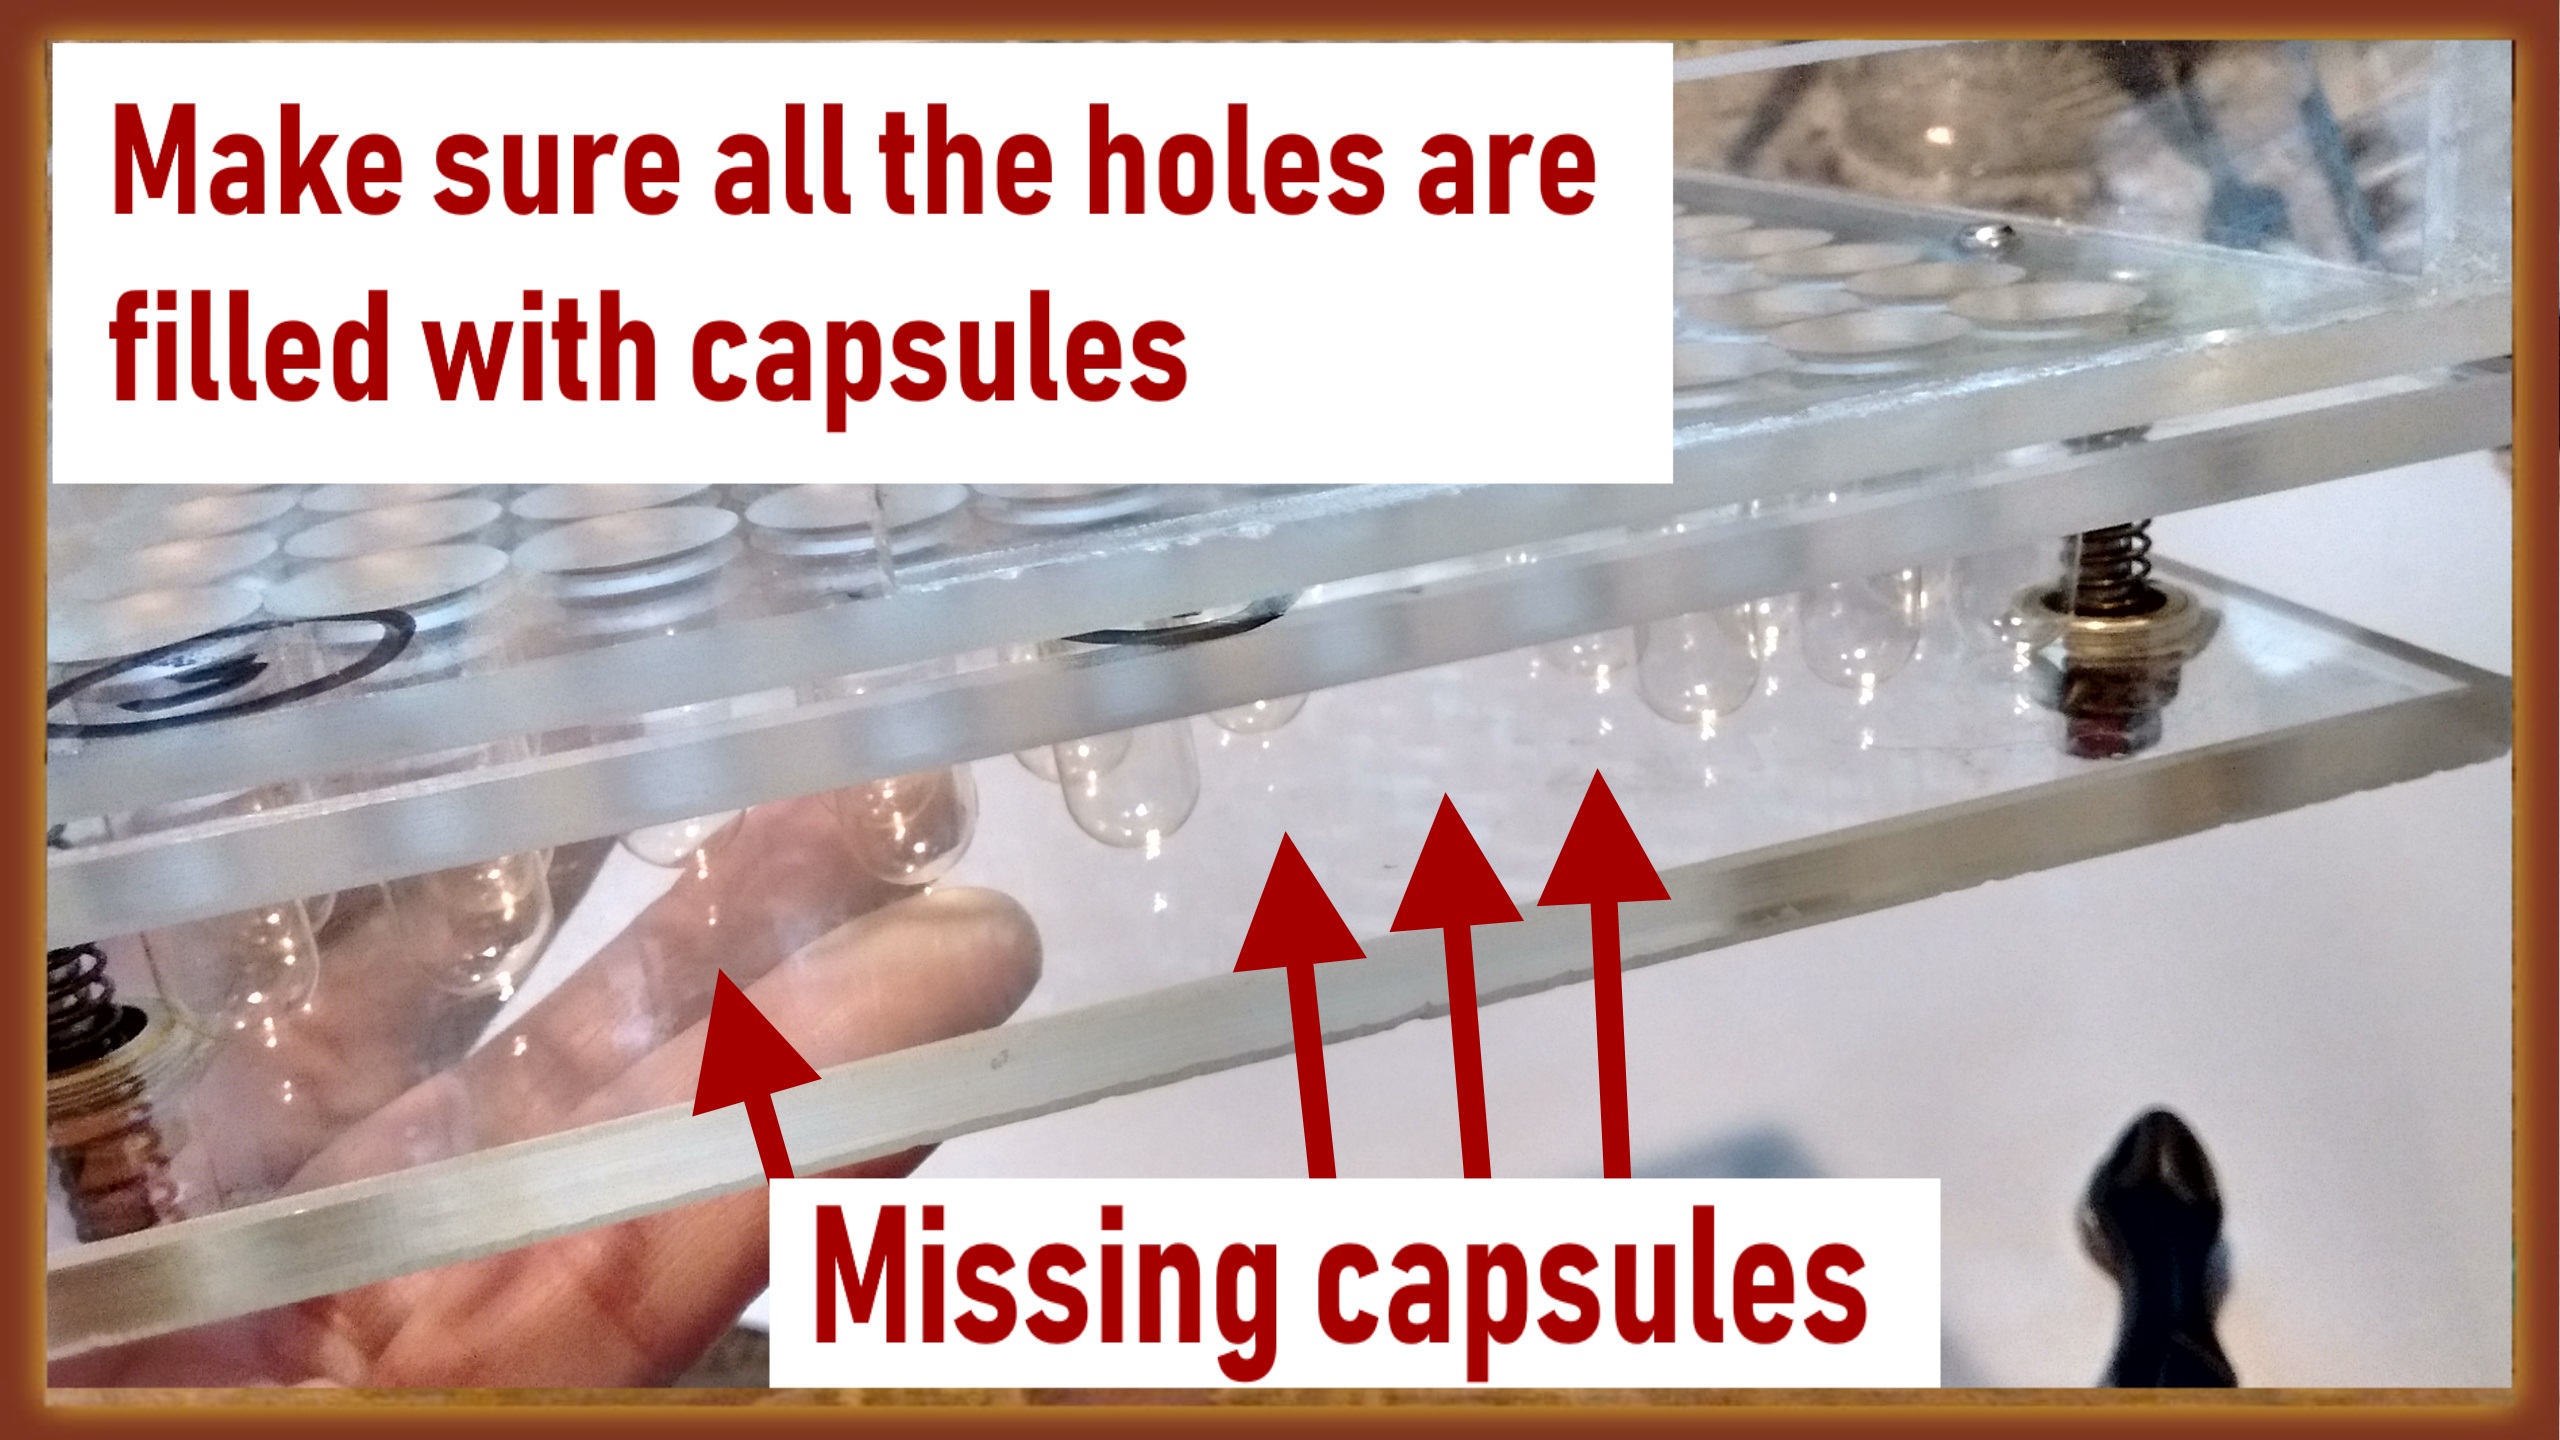
Now you have to visually inspect the holes to make sure they are all filled with capsule bottoms that there aren’t any double-stacked. This part is a little tricky because if you’re using clear capsules, they are hard to see.
Next, align the #3 Director Plate over the #2 Cap Plate and gently push and join them together. Repeat what you just did with the bases, but do it with the tops. Pour a generous amount of tops onto the Director Plate, cover the side opening with your hand and agitate them from side to side until they fall into their holes. Dump out the excess and visually inspect for any missing or double pieces. Set this aside when you’re done.
Filling Your Capsules
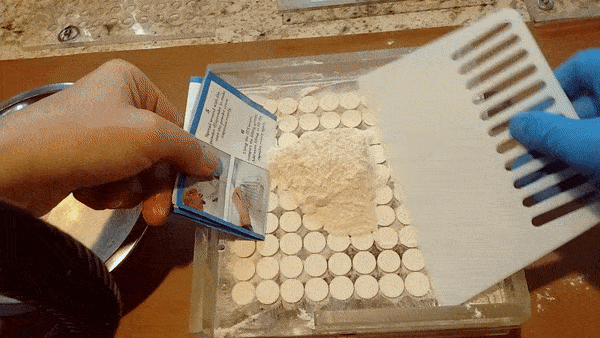
After some trial and error, I decided to modify the manufacturer’s instructions. They tell you to pour the powder over the capsules in the Body Plate and spread it around. Do this and you will regret it. Without any sides to contain the powder, you are unable to get any volume with which to push it down. It pours over the sides and creates the most unevenly packed capsules I’ve ever seen.
Instead, modify the process by having the Director Plate on top of the Body Plate. Now you will have the ability to push the powder down more evenly and efficiently. The included powder spreader will NOT work during this part, it is too big. Use a stiff card or do what I did, fold the instructions in thirds, and use that.
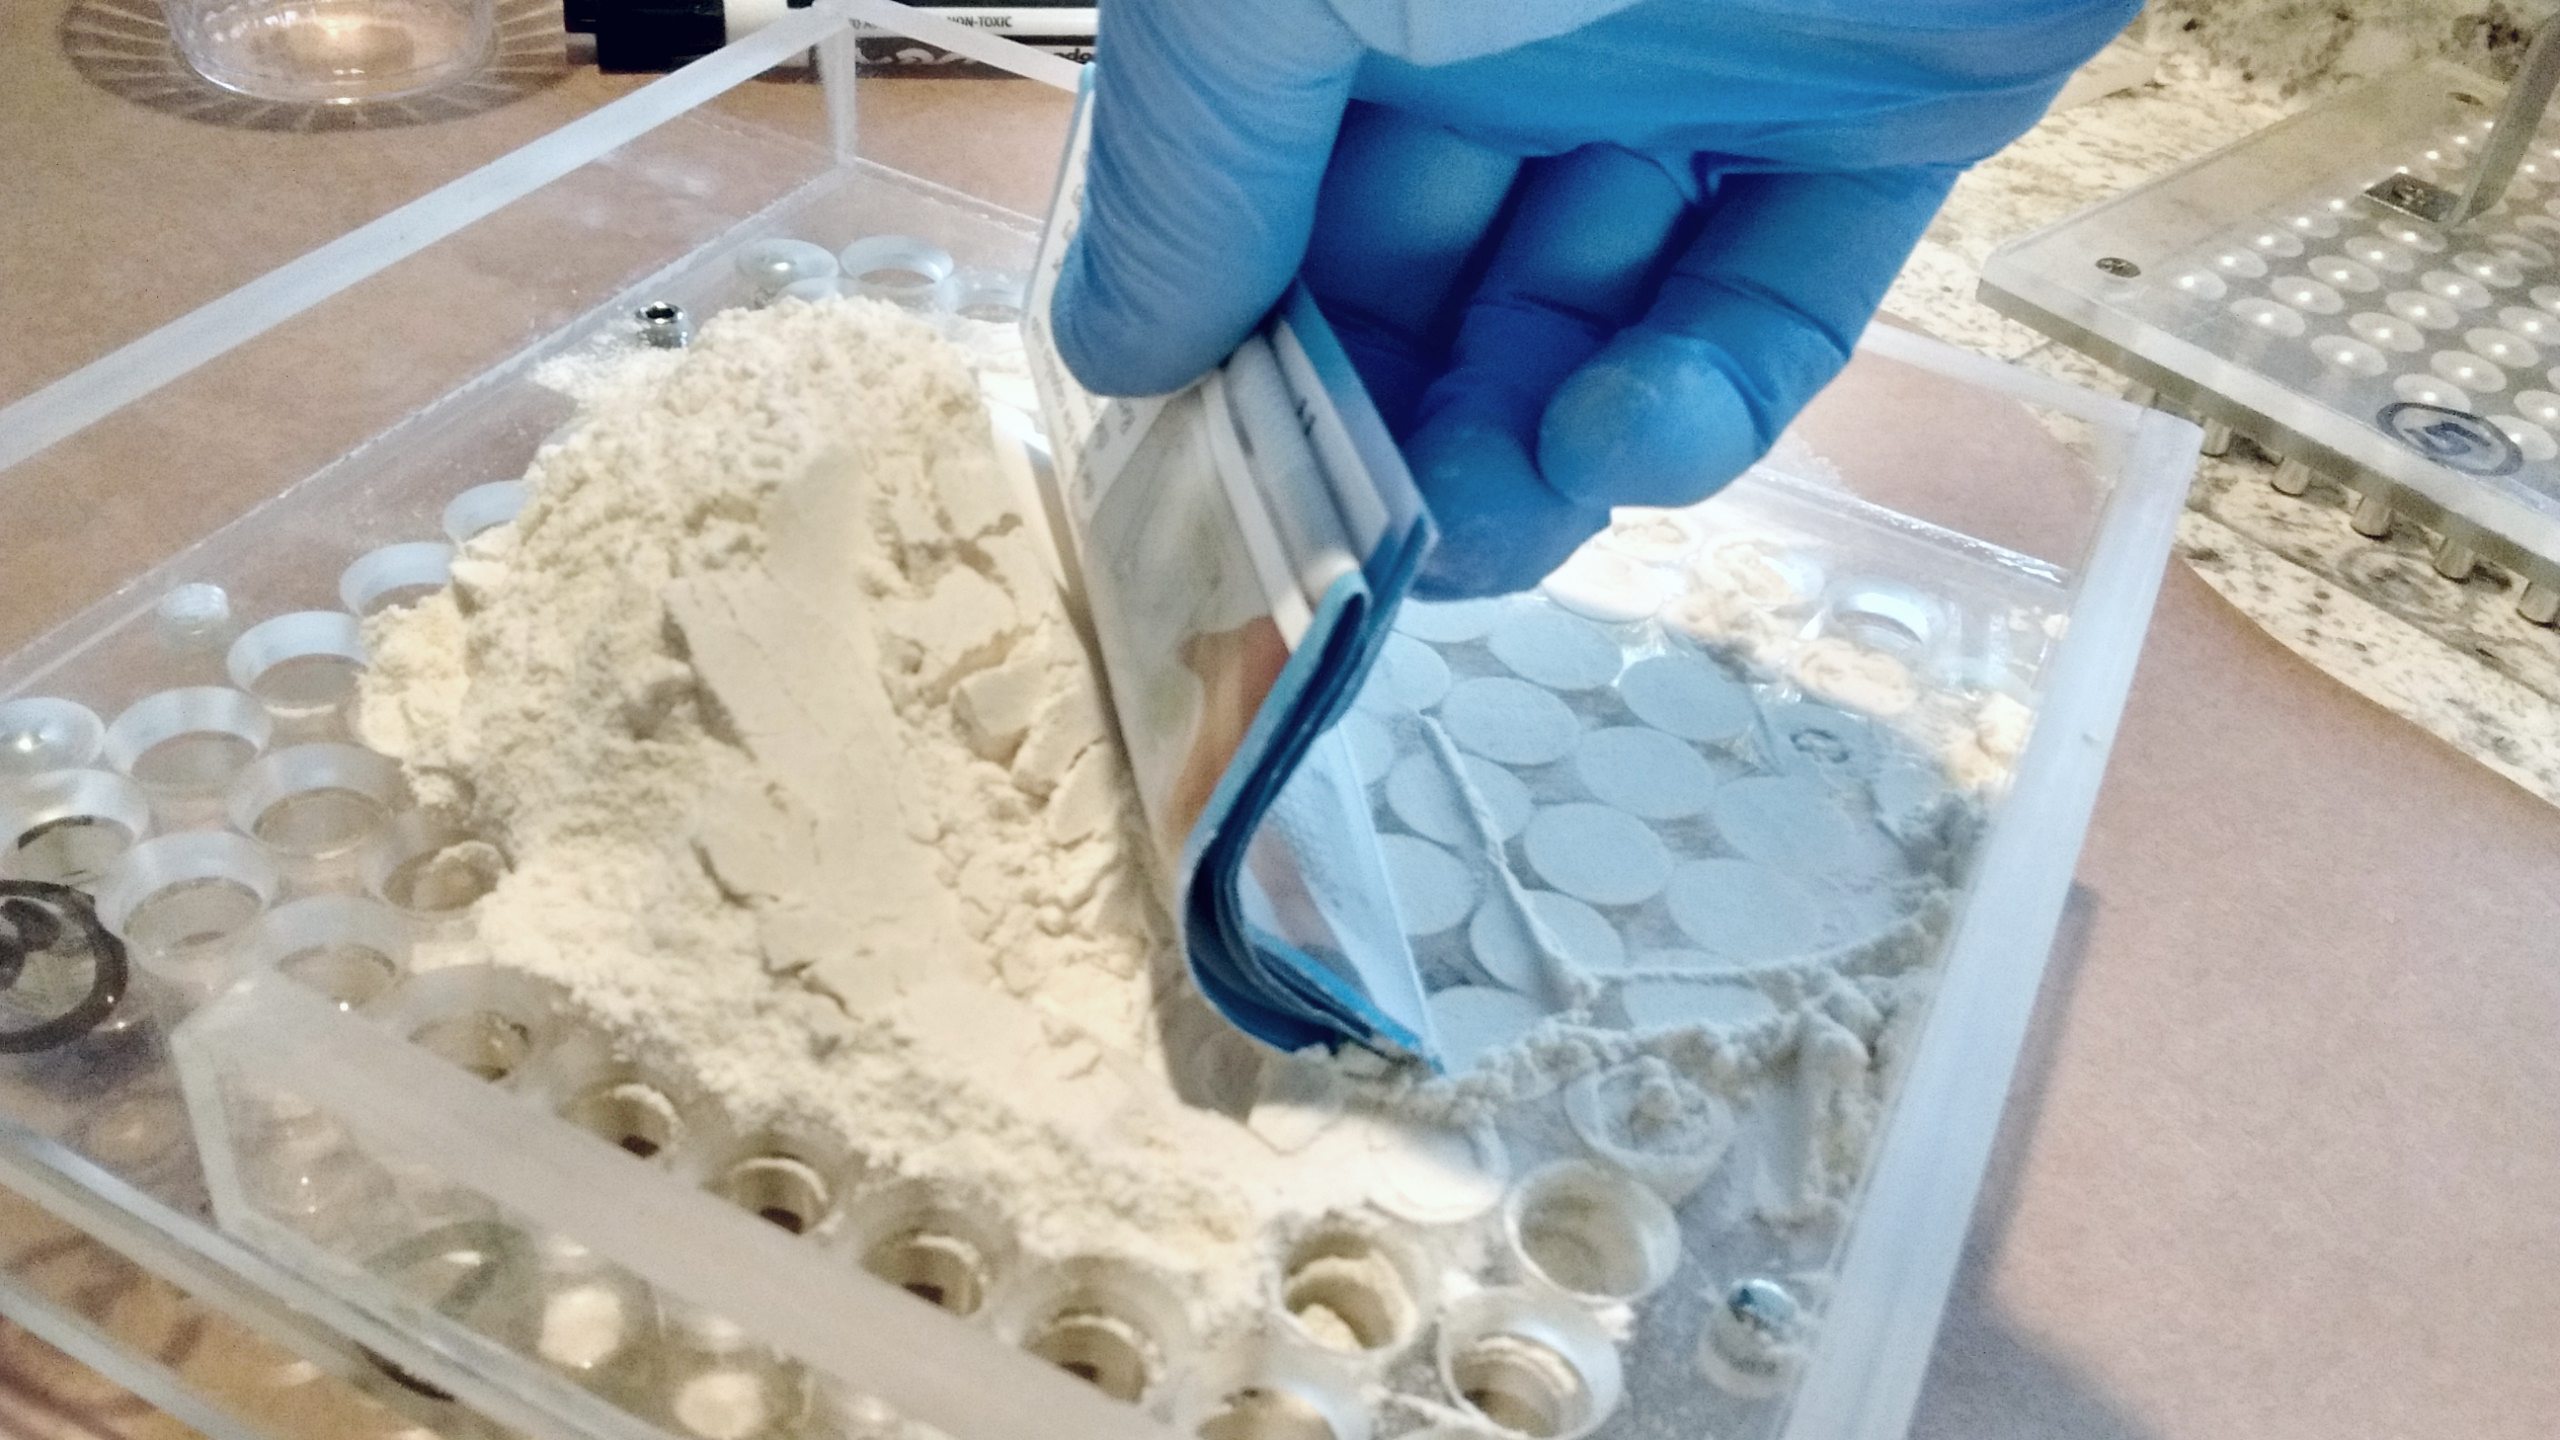
After you’ve spread and pushed the powder down into the holes, clean the excess off of the surface
Next, remove the #3 Director Plate. Press the remaining powder into the holes, clean off the excess, and use the tamper. When new space is freed up in the capsule, you can add a more powder to maximize your capsule’s capacity. You can see a demonstration in this video:
Now it’s Time to Cap Them
I have a love-hate relationship with this process. I love the ability to place 100 caps at a time, what a great invention! On the other hand, it just never seems to go smoothly. Maybe I’ll get better after a few more rounds with this machine and maybe you’ll have better luck than me. However, I have found that every time I use this machine, some tops don’t click on the bases, some capsules get crushed, some bottoms get smushed if I push too hard, and some capsules get stuck in the holes and they’re difficult to remove.
To begin the capping process, pick up Part #4, the Middle Plate, make sure the grooves are facing upwards, and place it carefully on top of Part #2 the Cap Plate. Part #4’s job is to hold the caps in place because you are about to carefully pick up those two pieces, keeping them together, and gently flip them upside down. Align and place them on top of the capsules you just filled. Press it down, gently at first, to get a feel for it. You are in the process of putting the caps on now, so if you push too hard, you run the risk of crunching the bottoms of the capsule bases. If you are too rough, you risk cracking the edges of any misaligned caps. If you press too lightly, the caps might not click-lock onto their bases. Here’s the process:
Results will vary, but here’s mine:
I needed tweezers to get a couple of damaged and stuck capsules out of the holes, but overall, it did the job. I’ve seen videos where people have gotten better results than me, so keep your hopes up. If you can master this Plexiglass capsule filling machine, you could really same a ton of money making supplements.